Friday, August 31, 2012

Get Ready! A Back to School FREEBIE Collab with Debbie coming MONDAY!

My friend Debbie at Paper Pulse and I have been inspired to get together and celebrate the nip in the air and children with appley cheeks and all things the coming of Autumn inspires by creating some FREE and fun cutting files (and I’ll include png files for you to make… whatever inspires you, such as digital templates) with a BACK TO SCHOOL theme.  Our projects will be perfect for the students and teachers in your life.  We will upload on MONDAY

I’ve had a sneak-peek at Debbie’s give-aways and and it’s preetttty exciting.  So stay tuned!

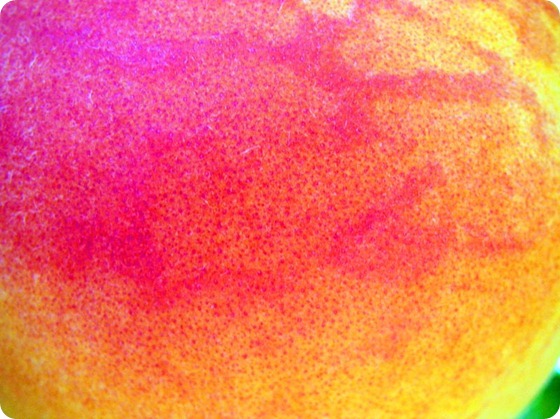
In the meantime, because you all can’t live here in the beautiful, sunny fruit-basket of the Okanagan Valley (postal code V0H for Valley Of Heaven) so I’ll leave you a close up of a fresh peach with the fuzz so you can just rub your cheek on your computer screen to enjoy what I get to enjoy right now Smile 


Peach-Fuzz

Tuesday, August 28, 2012

I make the Mojo Card and YOU get the Baby Buggy FREEBIE!

BABY SHOWER

My friend Janice is hosting a baby shower for another friend today and I scrambled to create a baby card yesterday morning.  I wanted to tie it in with the Mojo Monday challenge as well.  Janice always comes up with the coolest ideas and she’s chosen an Alice in Wonderland theme.  Right… my card has nothing  to do with Alice or the Hatter, but it does manage to fit the Mojo challenge. 

Mojo Monday 256

Ah, I really struggle with round cards.  I find them amazing when other people make them but they fall over for me.  Really - even if I make the thing at the back to anchor it - and I know I know it could be put in a plate stand but then I have to make sure to give it to someone who has one if it’s a mailing card rather than a giving card. 

So I stuck with square.

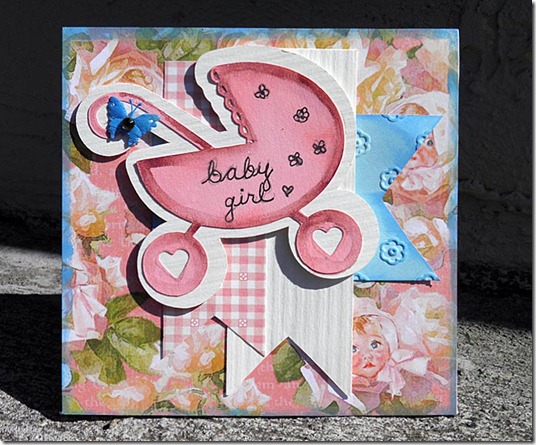
Baby-Buggy-Card_Barb-Derksen

SUPPLIES

Designer Paper - Peekaboo Little Darlings Collection Graphic 45

Inks - ColorBox 

Paints - niji Pearlescent

Embellishments - Dollar Store

Baby Buggy - Barb Derksen

Oh how I struggled with this card.  I reworked it so much I’m surprised the bits stay on it. I decided to create a border with ink rather than layer more paper behind the base - I trimmed a piece of scrap paper and then used it to mask out the middle, then stamped all the way around. 

I fiddled and FIDDLED with all the ‘ribbons’ and though the placement is not exactly like the sketch this is what worked for me.  I embossed the big blue ribbon to differentiate it from the other two.  I cut my Baby Buggy and backing. I wrote the greeting on with a black Gelly Roll.  Then I fixed the buggy to the card using double sided tape.

I said “YUCK”

Something was missing and I wanted to toss it out the window.  I pouted and then walked away for a bit.  When I came back I decided to jazz it up a bit with my trusty Pearlescent paints as they are so handy.   Worked - choosing a slightly darker shade of pink I enhanced the edges of the buggy.  I’m happy with it in the end. 


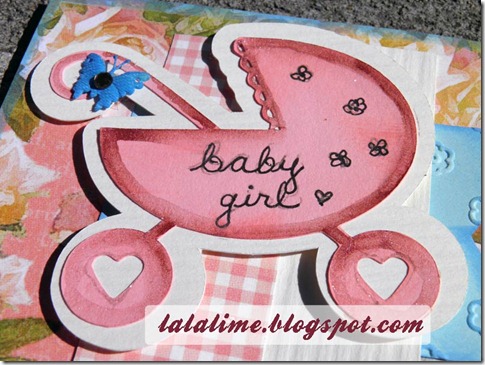
Baby-Buggy_Barb-Derksen


My handwriting is NOT the best, so I have also tossed a nice “baby girl” and “baby boy” sentiment which is MUCH smoother - and you can fit it onto your card where you like as well. 

Baby-Buggy-preview_Barb-Derksen

Donations gratefully accepted - link in sidebar to right!

If you can’t donate, can you Tweet, Facebook or Pin me in Pinterest please?

DOWNLOAD

png, svg, pdf, dxf and .studio

Personal Use

FOOD STORY

We love to eat pizza in our household.  I’ve been making the Artisan Bread in 5 Minutes a day bread for years now and it makes making pizza a snap.  If you’ve never heard of this bread or need a refresher you can watch the Youtube Video HERE.  I’ve shown probably well over a hundred people how to make this bread.  I’ve shared the recipe with people who’ve never made bread (lots of guys even!) and people who’ve made bread all their lives - all are astounded. 

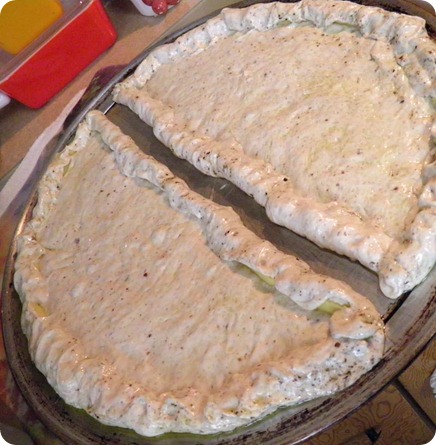
For pizza, I make a 1/2 recipe and then  I just smooth it out on a well (Olive) oiled pizza pan or cookie sheet.  I add a little extra oil on the top after its smoothed because this makes a good barrier between your dough and sauce, you never end up with soggy crust syndrome.  I also cut strips of cheese and fold it into the edges all the way around.  Once all the toppings are on I bake it at 400 for 20 - 30 minutes.  (this is different than the instructions for baking in the video) 

At any rate, I love to experiment and so this time I wanted to bring some local flair to the pizza.  When I shared my thoughts with my Mr. he was horrified and so we came to a compromise.

Pizza-Story-1

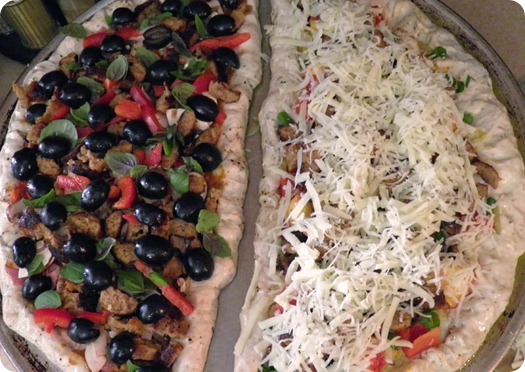
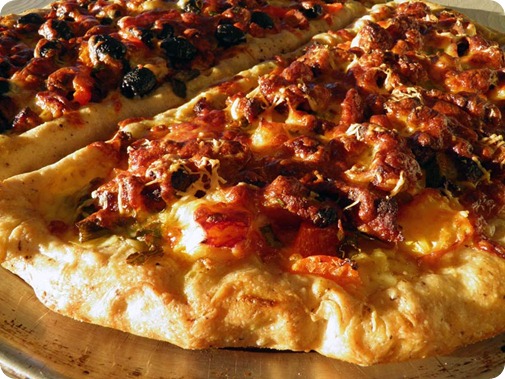
It’s a “his & hers”!

Pizza-Story2

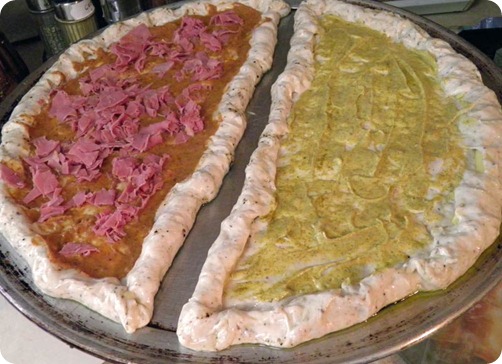
His is the left side, mine the right.  His is all out Italian.  With a rich tomatoe base he starts piling on the meats.  I’ve begun mine with a definite Indo flair - I mixed some mayo with a touch of mustard and curry powder to taste (this makes a super-delicious dip for chicken fingers too, in a pinch) 

Pizza-Story3

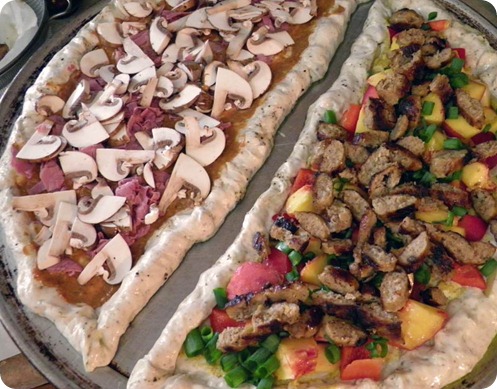
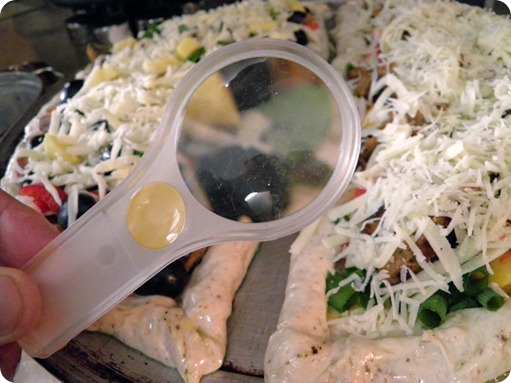
His side now sports mushrooms while mine has some orchard happening with some firm and fresh nectarine and peach chunks.  Next comes snipped green onion, red peppers and browned hot Italian sausage. 

Pizza-Story4

His side now looks like an Italian flag with red peppers, bright green basil and its dotted with olives. I’m ahead with the cheese.

Pizza-Story5

Oh Oh - he’s trying to locate the little bitty eensy piece of peach or nectarine which may or may not have landed on “his side”

Pizza-Story8

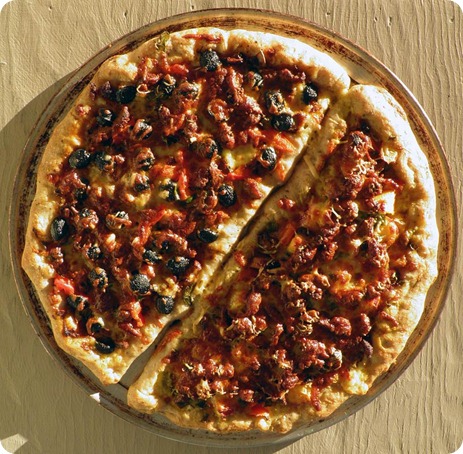
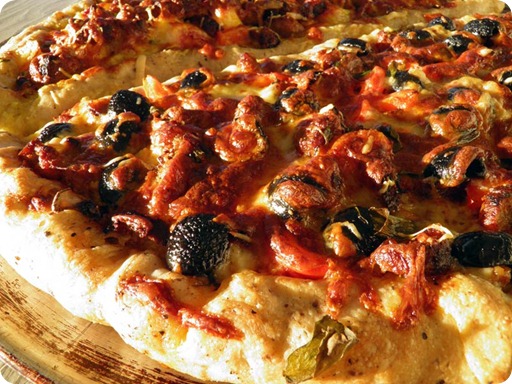
It baked up delicious looking in the end though there was no tempting him to sample off of my region.  More for me I say  Smile

Pizza-Story6

HIS

Pizza-Story7

MINE

its ALL good


Jack Sprat could eat no fat

His wife could eat no lean

And so between them both, you see -

They licked the platter clean!


Have a terrific week!

barb-siggy

Blogger Labels: Mojo,Card,Baby,Buggy,FREEBIE,SHOWER,friend,Janice,ideas,Alice in Wonderland,theme,SUPPLIES,Designer,Paper,Peekaboo,Little,Collection,Graphic,Inks,ColorBox,Paints,Pearlescent,Embellishments,Dollar,Barb,Derksen,ribbons,placement,ribbon,Roll,YUCK,jazz,girl,sentiment,Donations,Tweet,Facebook,Pinterest,DOWNLOAD,studio,Personal,FOOD,STORY,Artisan,Bread,Minutes,refresher,Youtube,Video,recipe,Olive,dough,sauce,crust,Once,flair,Italian,Indo,sports,orchard,basil,region,Jack Sprat,wife,meats,pizza,cheese,nectarine,peach

Sunday, August 26, 2012

Subraru Ironman Triathalon Photos


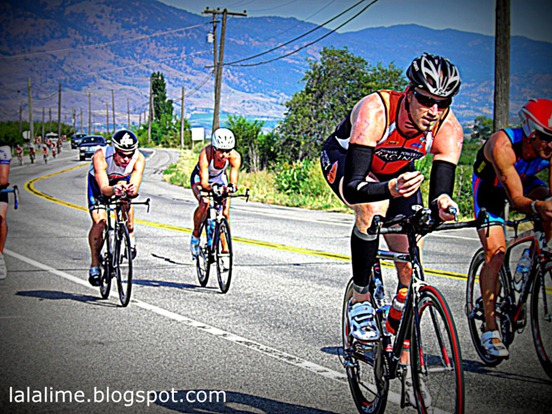
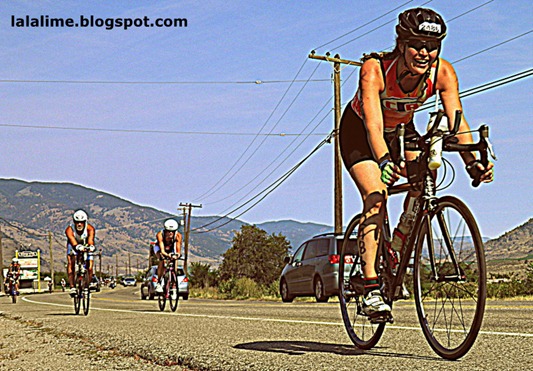
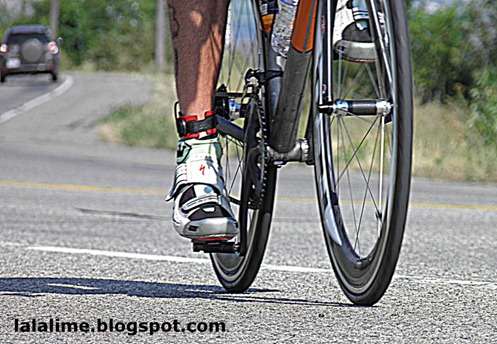
I “skipped out” on church this morning because I felt I would be the biggest encouragement today by cheering on triathletes for this year’s Ironman Triathalon.  The course passes by on the highway not so far away from home.  Here are some of the photos I took between clapping my hands till they hurt (they’re still buzzing) and cheering. 

1-P8260639 edited

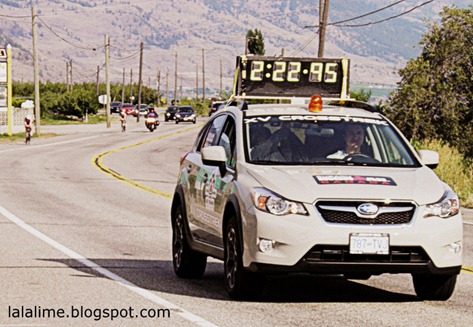
First glimpse - some of these athletes are FAST!  A time car always preceeds the leader.

1-P8260648  edited

I’m not absolutely certain why this second timer car is here - I would assume they would catch the first WOMAN athlete. 

1-P8260663

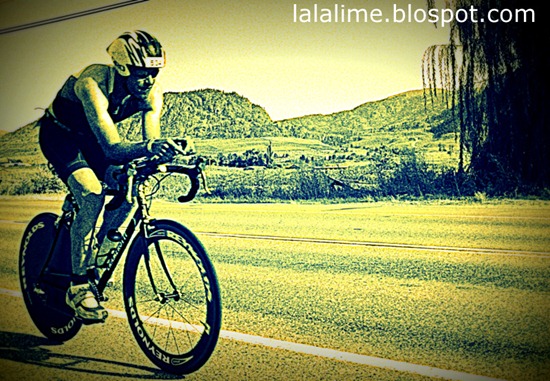
Some make it look so easy!  This race consists of a 2.4 mile swim, 112 mile bike and 26.2 mile run.  You’re seeing this man just short of the 1/2 way point of the bike ride.

1-P8260719

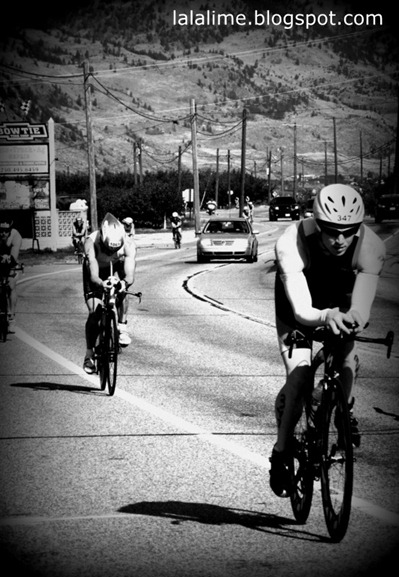
It takes patience and understanding for both triathletes and traffic competing for space on the often busy summer highways.

1-P8260747


1-P8260780  edited

I knew I’d made the right decision to stay and cheer when I received smile after smile and “thank you’s” back from many of the competitors. 

1-P8260765  edited

This is the last Subraru Ironman Triathalon for Penticton - next year will see something similar. You can read about it HERE.  I sincerely wish all this year’s athletes the best - RIDE ON!  Thank you for visiting our area.  Thank you to our local radio station EZRock Osoyoos for live coverage of this event.

Blogger Labels: Subraru,Ironman,Triathalon,church,encouragement,highway,Here,glimpse,FAST,leader,timer,WOMAN,athlete,Some,bike,patience,traffic,decision,Penticton,RIDE,Thank,area,radio,EZRock,Osoyoos,coverage,event,Photos,athletes,highways,competitors,triathletes,mile

Saturday, August 25, 2012

Word Art Wednesday 42 Card & 12 Petal Flower FREEBIE for YOU!


Thanks for all of you who have donated to my blog to date (donate button in the sidebar right of my blog writing here) it really helps.  It took me an entire day to create and save and demo the files I’m giving you today.  I’m teaching myself Inkscape and am pretty proud to say I learned how to save the files to dxf format as well - this is a format which should work on some of your cutting machines that I have not covered just yet. Silhouette software is compatible with dxf.   Please let me know if I am missing any conversions - your donations are employing me to learn more so I can therefore give away more files to YOU!  I appreciate your input and suggestions of files you would like me to attempt and also what formats to save into.

CARDS

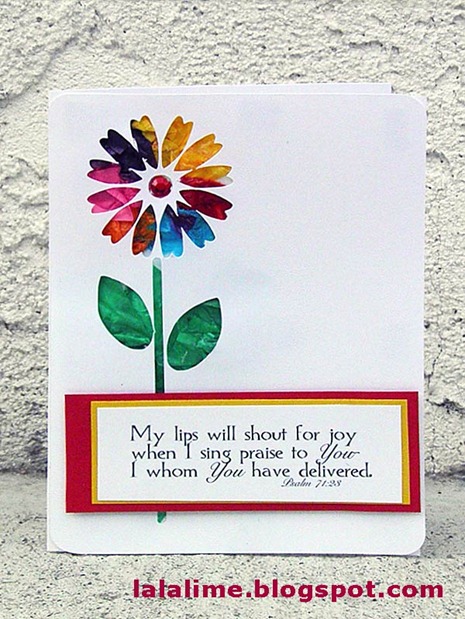
I’m glad to be taking part in this week’s challenge - Word Art Wednesday #42  This week’s theme is JOY!   If you’d like to join in, this particular challenge is based on Psalm 73:21 and you can download the free word art for your project at the blog site.

This is my interpretation in card form!

Twelve-Petal-Flower-Card-2b_Barb-Derksen

SUPPLIES:

Word Art - Word Art Wednesday

Flower Cut and Template - Barb Derksen (me haha!)

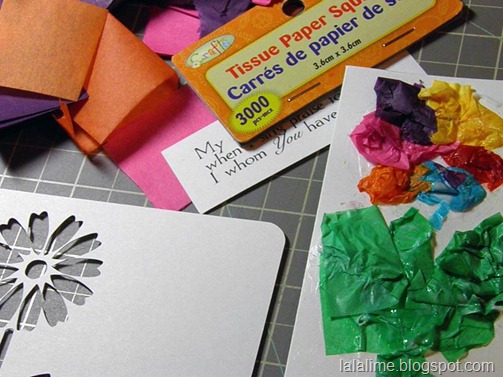
I wanted to make this card bold and colorful and fun because this is a very happy scripture.   I had picked up a package of small blocks of tissue paper from a Dollar Store and was itching to use them and this project turned out to be a perfect fit.  I designed a card face (quarter fold card) and cut the template.

Twelve-Petal-Flower-Card2a_Barb-Derksen

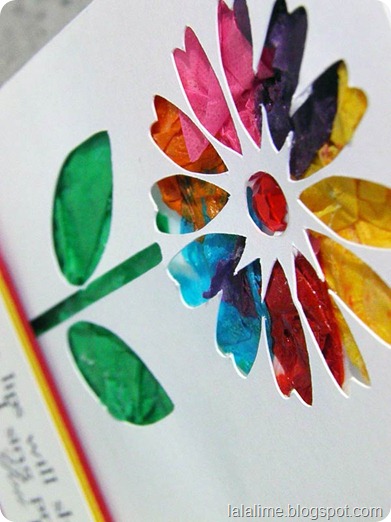
Next I penciled in a general area where the flower and stem would be positioned onto the the card base.  I brushed some glue all over this area and then I began laying in bits of Tissue, scrunching them up for good texture.  I hovered the template over top to be sure it matched the cut out and once I was happy with it I added double sided foam tape to the back of the template and glued it onto the card face!

Twelve-Petal-Flower-Card2c_Barb-Derksen

Twelve-Petal-Flower-Card2d_Barb-Derksen

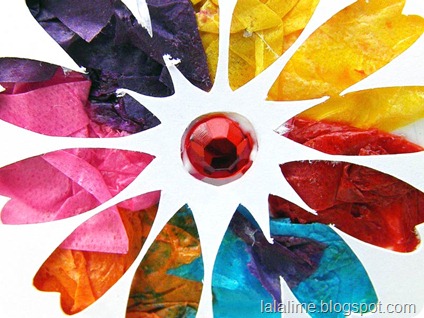
I added in a little gem in the center to “finish” this pretty flower. 

WW

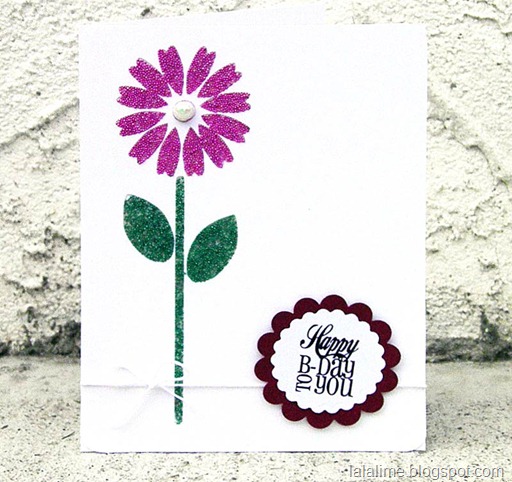
I couldn't help but try a second version of a card using a slightly different technique and also some beads I bought at the Dollar Store as well.

Twelve-Petal-Flower-Card1a_Barb-Derksen

Word Art: Create With TLC

This photo really does not do my card justice - its really eye-catching!  Here is how I created this version:

Twelve-Petal-Flower-Card1b_Barb-Derksen


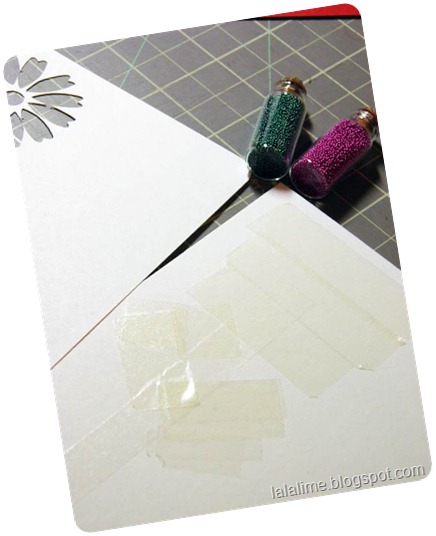
Once again I gathered a blank card base and the cut face for my 12 Petal Flower.  Next I simply laid strips of double sided tape over the general area where the flower will appear.  Next I added double sided adhesive tape to the back of the template and then affixed it to the base. 

Twelve-Petal-Flower-Card1c_Barb-Derksen

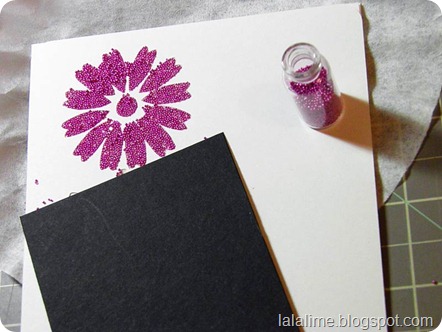
I laid the card on top of a coffee filter (a nifty trick my sister showed me - it catches all the beads left over and is easy to fold and funnel the strays back into their teeny jar)  and then I shielded the flower stem with a piece of black cardstock because I don’t want the pink beads to adhere to the stem part.  Once I had the petal part done and all cleaned up then I placed the cardstock over the petal part and filled in the stem and leaves with the green beads. 

Note - when I created this file you see a line section in the middle of the leaf - this does not show up in the template because I did not join it to the leaf shape.  Next time I think I’d do two versions.

Twelve-Petal-Flower-Card1d_Barb-Derksen

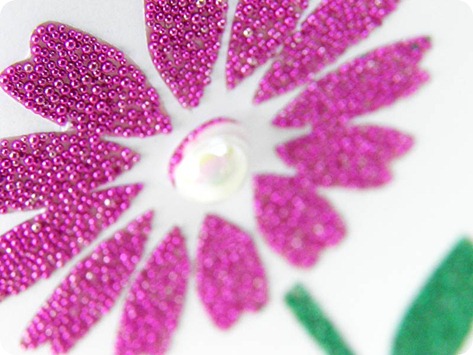
The finishing touch to this card is a pearl accent with pastel colors accenting it.  I may wind up brushing the beads with a light coat of clear nail polish (being very careful not to get close to the outside edges of the petals so I don’t mess it up) but just so the beads are really secure. 

1-pen flower

And finally, I created one last look on this flower by creating a dotted pattern in the petals and then using the (drawing) pens in my Silhouette SD.  I am amazed at how well my machines draws out the most tiny of details. This one is sttill a work in progress - I ‘penned’ the flower and petals and then enhanced them a bit using watercolor pencils.  I will add this sentiment on the side and add some sort of ribbon to it. 

Barb Derksen’s 12 Petal Flower

DOWNLOAD

png, SVG, dfx and .studio

Personal Use

WW


Blogger Labels: Word,Card,Petal,Flower,FREEBIE,Thanks,demo,files,Inkscape,machines,Silhouette,donations,CARDS,theme,Psalm,interpretation,SUPPLIES,Template,Barb,Derksen,tissue,paper,Dollar,area,texture,version,technique,Create,photo,justice,Here,Once,strips,adhesive,piece,Note,leaf,pearl,edges,sentiment,ribbon,DOWNLOAD,studio,Personal,conversions,suggestions,beads,versions,blog,week,cardstock,petals

Thursday, August 23, 2012

Need a JOLT of JAVA? Element and Word Art FREEBIE for you!


FREEBIE

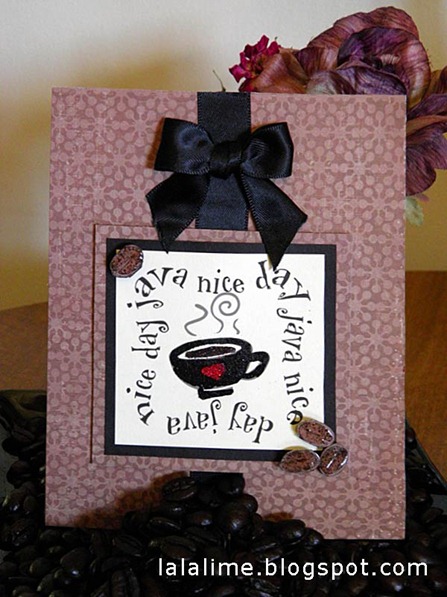
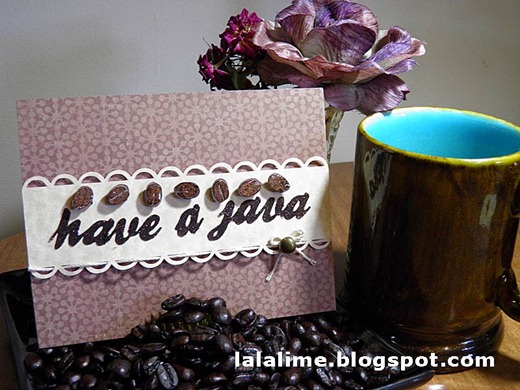
Today’s freebie is one I created for Diane who would like to make a coffee themed card.

I am a coffee addict myself I freely admit so this was a fun project for me.  I created two versions of cards so that I could use some of Paulette’s (Create With TLC) fun Word Art from her store.  (and check out her blog for some wonderful freebies as well!) Thanks for all of you who have donated to my blog to date (donate button in the sidebar right of my blog writing here) it really helps.  It took me an entire day to create and save and demo the files I’m giving you today.  I’m teaching myself Inkscape and am pretty proud to say I learned how to save the files to dxf format as well - this is a format which should work on some of your cutting machines that I have not covered just yet. Silhouette software is compatible with dxf.   Please let me know if I am missing any conversions - your donations are employing me to learn more so I can therefore I need your input and suggestions of files you would like me to attempt and also what formats to save into! 

I made two versions of cards:

Coffee-Beans-Card4_Barb-Derksen

Coffee-Beans-Card1_Barb-Derksen

SUPPLIES:

Designer Paper - “Candy” Snowy Day Collection, cratepaper.com

Jewel Glitter Ritz in Java Bean

Stampendous Embossing Powder in Detail Black

Stickles Xmas Red

Glossy Accents

Ribbon - Satin Ribbon by Details & Accessories

Printed Word Art - Coffee Anyone Set - Create With TLC Shop

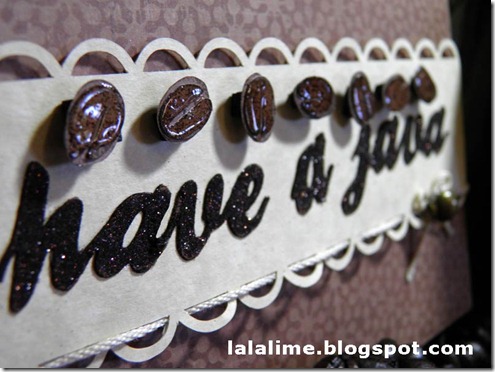
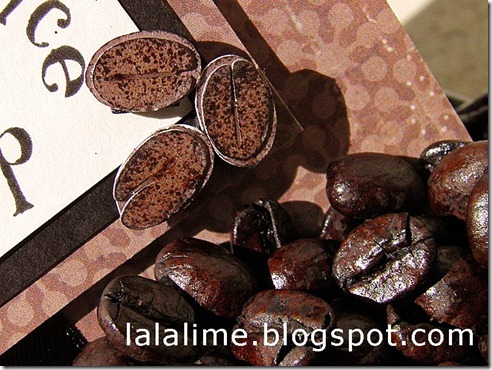
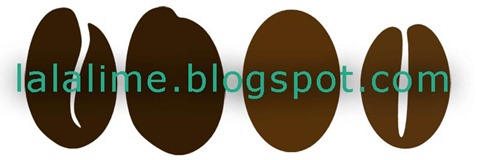
Coffee Beans - FREEBIE by Barb Derksen


I created the beans in two layers, so that when glued together, and even if you should just stamp them they will have some shape to them.  I added Glossy Accents on top do give them a gloss - after stamping them.  The chalk ink I used resisted a bit so they have a bit of a speckled look but I think its ok. 


Coffee-Beans-Card2_Barb-Derksen

I cut the word art, used the wide end of my TomBow Multi glue to coat and then sparkled it up with Glitter Ritz. 


Coffee-Beans-Card5_Barb-Derksen

Coffee-Beans-jpg_Barb-Derksen


DOWNLOAD

Formats: PNG, dxf and .studio

Personal Use

d ♥ d

THANKS

photo (2)


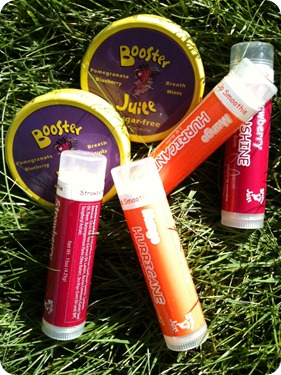
Thanks to Betty Dish and Booster Juice for this nice little prize package I received in the mail!  My lips are smackin’ already - my Mr. says the glosses are nummy  Smile


d ♥ d

INSPIRATION

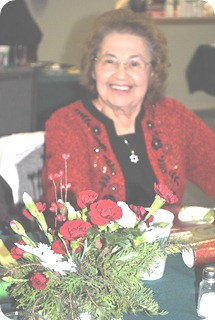
I’ve lost a dear friend lately - a wonderful and inspiration woman from my church family - Kaye. 

DSC_0138

She was a true prayer warrior and an encourager too.  She always had a smile and her personality out sparkled her glittery attire (she was always dressed so lovely)  In fact, Kaye never used a computer at all but she was SO excited when I told her about the blog I had going for our church - really, she had absolutely no idea what a blog was but she wanted to contribute and often provided her original poetry for my posts.  I will miss her greatly. 

I was delighted to find I’d recorded her a bit in the past and was  able to share her testimony at her service recently.  Hearing her voice, hearing her message had a great impact - for her words brought a smile and delighted our hearts and gave us hope.  I’d like to share them with you today - and then I will also add a poem I read that I think Kaye would have liked - as it brings me comfort thinking of her in Heaven!


Press the blue PLAY button on the left


I wonder if the world is full

Of other secrets beautiful,

As little guessed, as hard to see,

As this sweet, starry mystery?

Do angels veil themselves in space,

Do white wings flash as spirits go

On heavenly errands to and fro,

While we, down-looking, never guess

How near our lives they crowd and press?

If so, at life’s set we may see

Into the dusk steal noiselessly

Sweet faces that we used to know,

Dear eyes like stars that softly glow,

Dear hands stretched out to point the way -

And deem the night more fair than day.


d ♥ d

PHOTOS

Just some photos I’ve taken recently and would like to treat your eyes to.


1-P8230545

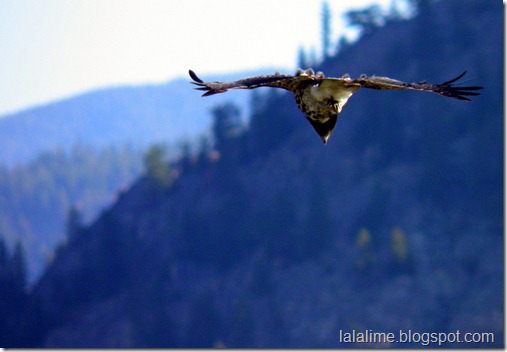
I watched this bird hover almost in the exact spot in the wind this morning.  It stayed like this for at least five minutes.


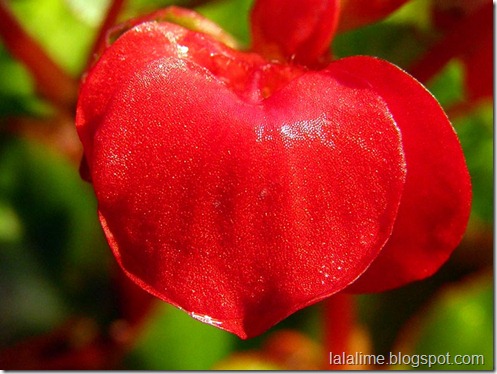
Flower-Leaf-Heart

The boldness of this heart shaped leaf on a common garden flower caught my (macro seeking) eye.


May you have a wonderful week!

barb-siggy

Blogger Labels: JOLT,JAVA,Element,Word,FREEBIE card,addict,Paulette,Create,Thanks,demo,files,machines,Silhouette,donations,SUPPLIES,Designer,Paper,Candy,Snowy,Collection,Jewel,Glitter,Ritz,Bean,Stampendous,Powder,Detail,Black,Stickles,Xmas,Glossy,Ribbon,Satin,Details,Accessories,Coffee,Shop,Beans,Barb,Derksen,gloss,Multi,DOWNLOAD,studio,Personal,Dish,Booster,Juice,lips,INSPIRATION,friend,woman,church,Kaye,prayer,warrior,attire,fact,computer,poetry,testimony,message,impact,words,poem,Heaven,Enter,caption,PLAY,world,errands,life,Into,dusk,Sweet,Dear,Just,bird,heart,leaf,garden,versions,freebies,conversions,suggestions,layers,glosses,hearts,angels,PHOTOS,cards,blog

Monday, August 13, 2012

Mojo #254 Card Challenge, HEALTHY No-Cook Chocolate Recipe and a FREE .studio cut!

FOOD

Alright, lets get the chocolate out of the way first because I know you are thinking “this sounds too good to be true.  Is there really truly a “healthy” chocolate?  Well, yes there is. These are an icebox sort of chocolates which are made with only three basic ingredients and after that you can add in whatever else you want in the way of fruit and nuts or just eat it plain. 

Those of you who know me know I am not a breakfast eater.  Right, I know that’s bad for me, but my husband brings me a chocolate and coffee each morning. Since I discovered this recipe and adapted it I’ve not bought chocolate because nothing compares.  The main ingredient in this recipe is Coconut Oil.  I’d never heard of it until recently when someone mentioned to me Coconut Oil is supposed to be good for memory.  I have a problem with memory.  I have a problem - do I have a problem? *wink*  Just ask my husband and he’ll attest! 

I was given a link to the following video of Dr. Newport who set out on a quest to find help for her husband who suffers from Alzheimer's.  It’s remarkable the difference that  Coconut Oil has made in this case!  If you watch, a lot of questions about Coconut Oil will be answered:


Since I’ve been using Coconut Oil I’ve found so very many more uses for it too - one favorite link is for 160 uses for coconut oil by Hybrid Rasta Mama.  Check it out!  My favorite uses so far are to take makeup off and also I made an insect repellent with it, adding some peppermint oil and grating in a bit of fresh lemon zest.  Works as good as any DEET I’ve tried.  In case you don’t watch the video you should at least know that Coconut Oil is the “GOOD” LDL, not the bad HDL that some people think it is and also that even though it is an oil = fattening?  Well, the thing is it is a very ‘satisfying’ fat, meaning it leaves you feeling full after eating it and curbs your appetite.  I’ve actually LOST weight since using it.  I’ve heard a local fitness trainer recommend it to clients.

On to the Recipe!


Ingredients:

1 cup Pure Coconut Oil

4 tbsp 100% Cocoa Powder

Tbsp (or less) Sweetener or Honey


Alternatives:

toasted coconut

roasted nuts

chopped dried fruit


Supplies:

Chocolate molds or

Plastic or Silicone ice cube trays or

Silicone muffin cups (as in this recipe)

Glass measuring cup

Cookie sheet or rectangular 9 x 13 bake pan


Note: These are intended to be served chilled because they melt at a very low temp! 


Method:
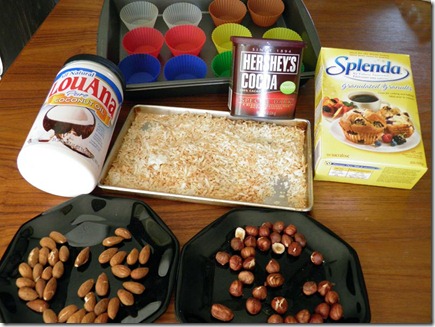
Ice-Choc1_Barb-Derksen


1.Gather your supplies together. 

2. If you want your coconut or nuts toasted, go ahead and do this.  I do my coconut in the toaster oven but I actually microwave the nuts in the micro - 2 mins for each plate, giving a stir around at the 1 minute mark. Watch out, the plate may be very hot!
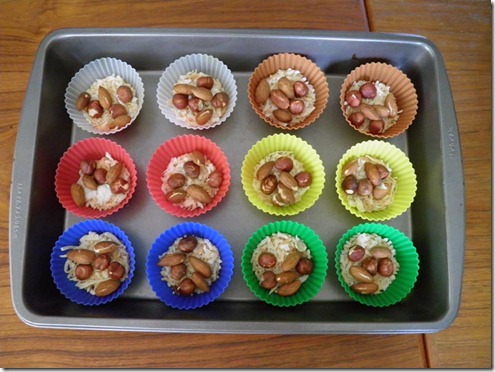
Ice-Choc2_Barb-Derksen

Place the coconut and nuts into the silicone muffin cups or whatever moulds you are using, nested into a 9 x 13 bake pan or on a cookie sheet.
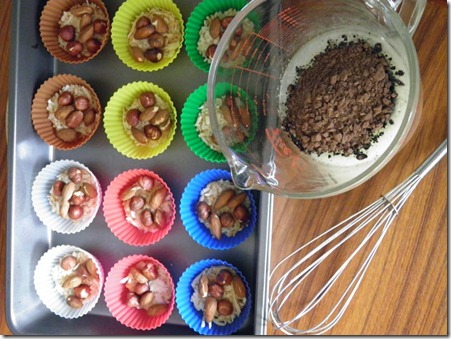
Ice-Choc4_Barb-Derksen

3. Mix the coconut oil, cocoa powder and sweetener or honey together (some folks add a drop or two of vanilla as well)  A note about the coconut oil, it has a very low melt point so when I’m making this right now its liquid, but if you’re making it when it’s cold you can zap it for 10 seconds or so, that's all it should need, in the micro or stovetop.
Ice-Choc5_Barb-Derksen

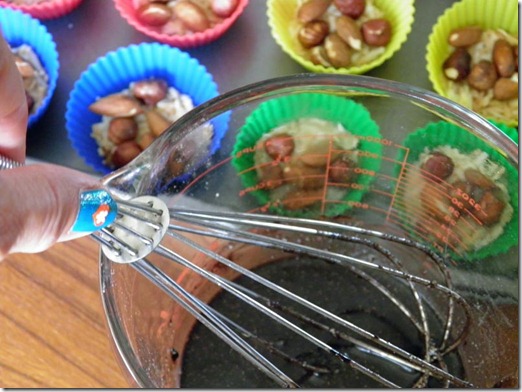
4. Whisk it together till it’s nice and smooth.  You might taste it at this point and make sure it’s sweet enough.  If you use honey you may have to whisk longer to break the honey up and incorporate it into the mix. 
Ice-Choc6_Barb-Derksen

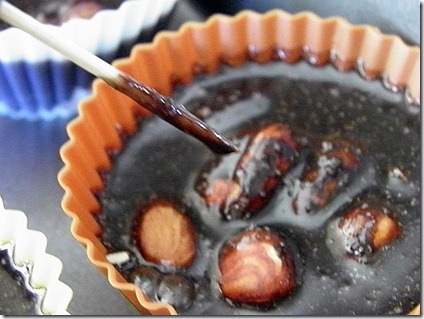
5. Once it’s mixed, pour it into the cups, and if you’re adding any nuts or coconut or other goodies in then you want to poke and stir a bit so the chocolate seeps down to the very bottom and is evenly distributed.
Ice-Choc8_Barb-Derksen

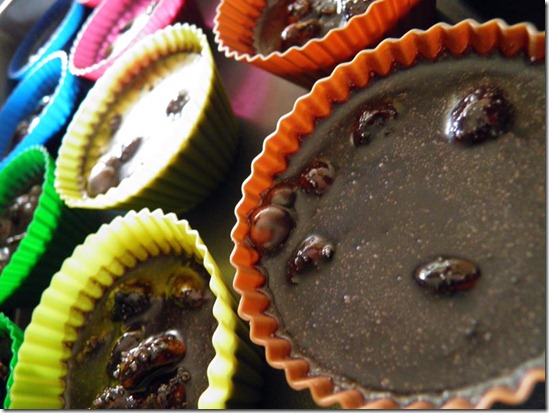
6. Once you’ve got all the cups full, pop them into the freezer!
Ice-Choc9_Barb-Derksen

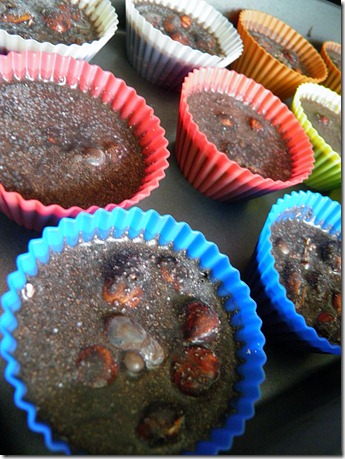
7. Here’s what they look like when they come out of the freezer, you may have a little “bloom” on the surface.
Ice-Choc10_Barb-Derksen

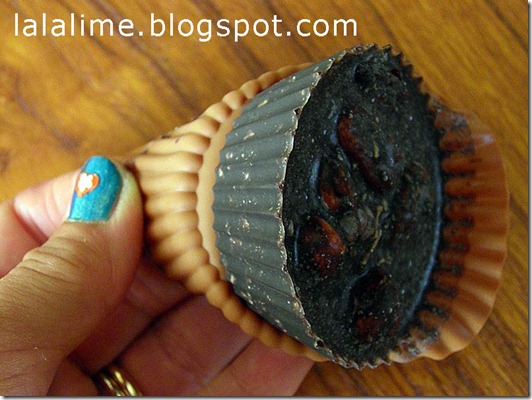
8. Turn the chocolate out of the silicone muffin cup - Voila!
Ice-Choc12_Barb-Derksen

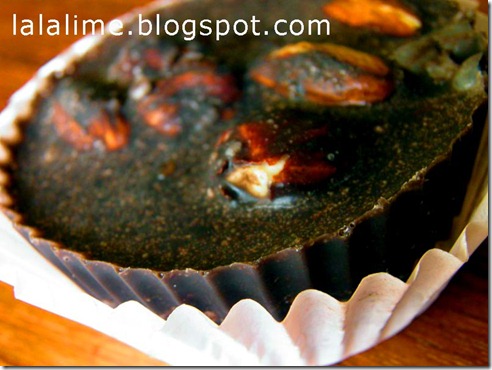
9. I put them into pretty paper paper cupcake wrappers (because they can be a bit messy or make you drool)
Ice-Choc13_Barb-Derksen

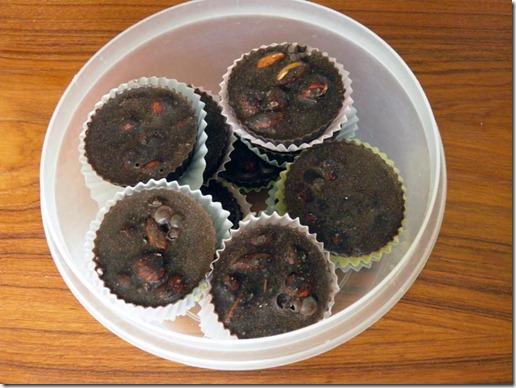
10. Store them in an airtight plastic container or a cookie tin in the freezer. 

CARD

Mojo Monday 254

The sketch:

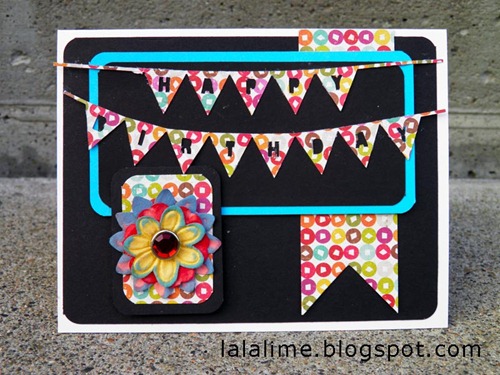
My take on it:
Happy-Birthday-Card_Barb-Derksen


Supplies:

Designer Paper: Crate Paper - Snowy Day Collection - Candy

Happy Birthday Banner - Barb Derksen 

Flowers and gems just random!


Won’t YOU play along?


FREEBIE
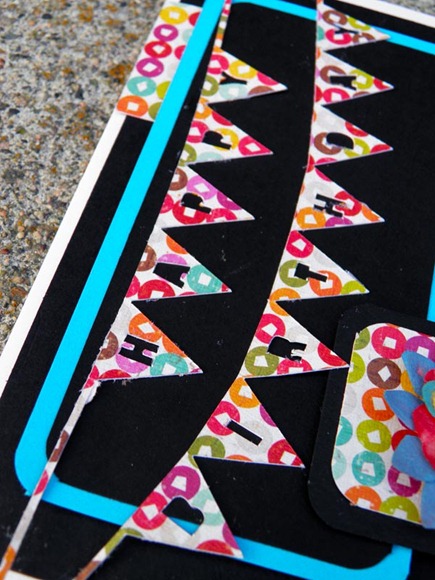
Happy-Birthday-_Barb-Derksen

.studio Cutting File

Personal Use

DOWNLOAD


I included two extra files along with the banner you see.  I made one of them with extra long strings on the side so you can make the banner ‘curve’ on your project and I also included a plain banner without the letters punched in so you might layer it with solid cardstock if you’re doing a project and need to have a solid color behind the lettered one.  I made this banner with the “string” so that you don’t even need real string if it’s not handy!

NOTE

Thank you for your donations this past week Smile 


Love at Home


There is beauty all around

When there’s love at home;

There is joy in every sound

When there’s love at home.


Peace and plenty here abide,

Smiling sweet on every side;

Time doth softly, sweetly glide

When there’s love at home.


I’m going to take one week off from designing and lavish some attention on my Mr. so won’t be commenting on any blogs at this time but will come around with portions of comment ♥ when I return.  In the meantime - ENJOY LIFE!

barb-siggy

Blogger Labels: Coconut Oil,Mojo,Card,Challenge,HEALTHY,Cook,Chocolate,Recipe,FREE,FOOD,fruit,breakfast,husband,ingredient,Coconut,memory,Newport,Alzheimer,difference,Enter,Hybrid,Rasta,Mama,Check,insect,zest,Works,DEET,appetite,LOST,trainer,clients,Pure,Cocoa,Powder,Tbsp,Sweetener,Honey,Supplies,Plastic,cups,Glass,Cookie,sheet,Note,Method,Gather,oven,Watch,Place,folks,Whisk,Once,bottom,Here,Voila,paper,container,Designer,Crate,Snowy,Collection,Candy,Banner,Barb,Derksen,Flowers,gems,FREEBIE,File,Personal Use,DOWNLOAD,files,layer,Thank,donations,Love,Home,Peace,Time,attention,meantime,ENJOY LIFE,healthy ingredients,portions,favorite,muffin,freezer

Total Pageviews

Popular Posts