Monday, July 30, 2012

I ♥ Cherries sooooo much - I’ve made a Cherry FREEBIE for YOU!

Living in the heart of the beautiful Okanagan Valley in British Columbia is living in fruit heaven. 
This year I’m all about the cherries.  I’ve never seen them so BIG! 
Happy-Cherry2-blog_Barb-Derksen
A BC cherry is a HAPPY cherry I say!
I’ve been freezing them in batches, so yes, my fingernails look horrible and my kitchen is speckled red and my fingers were getting awfully tired of my regular cherry pitter (though I’m sure it’s a drastic improvement over the ones our grandmother’s must have used) 
And then my sister came to visit and we were at Home Hardware in town - our Home Hardware is AMAZING - truly people come from all over to shop there.  Our Home Hardware is a shop with a heart - they do all sorts of good for our community and we’re really proud of them. 
So, we went and looked at all the gizmos and gadgets that might be new when we came across one of these:
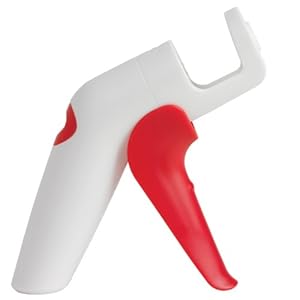
This is a Chef’n quickpit One-Handed cherry and olive pitter. 

P7280307
And it not only WORKS… it did not take my sister and I to declare a “show down”
Cherry-Face-Off_Barb-Derksen
That’s right, this hot little “cherry gun” PITTED sister against sister hehe. 
Well, actually we turned on our photographer (my Mr) who clued in at the last moment and just barely avoided being maimed.  He may take my cherry gun away if I’m not careful.
All this “cherry-ing” has inspired me to make a fun .studio cut for YOU!  I also built a card to showcase it for you - I think it turned out perfect!
Cherry-Love-Card_Barb-Derksen
Sentiment reads:
“One must ask children and birds how cherries and strawberries taste.”
-Johann Wolfgang von Goethe
Supplies:
Designer Paper - Your Life Beautiful by Brandin O’Neill
Inks - Versafine, Colorbox
Cutting File - Cherry Love by Barb Derksen
Method:
I cut the file on my Silhouette SD.  I inked the cherry pieces and then I heat embossed the cherries. 
Cherry-Love-Card-sm_Barb-Derksen


I’ve created this file both as a .studio cut but also as separate png’s as well so if you’re a digi-scrapper you can adapt the cherry for your needs as well. I would to see what you make with my files, send me a jpg and I’ll feature your artwork here!

Cherry-Love-png-prev_Barb-Derksen
Personal Use

Sunday, July 29, 2012

Crop Stop Challenge #82

I’m having a ball trying out some new challenges, just hunting them up via Google.  Today I thought I’d give Crop Stop a whirl. 
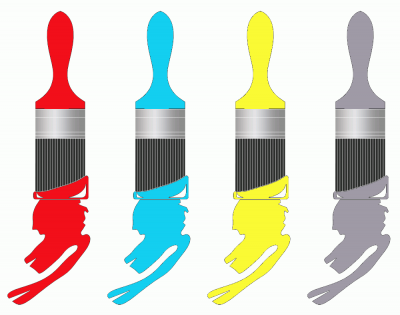
Use any three colors from the image below:
And so, I made:
CS82_Barb-Derksen
CS82_close_Barb-Derksen
Supplies:
Designer Paper - Young and Active in the Backyard by Ronni Mccray
Stamps - Studio G “Hello” and trim
                Inkadinkadoo for the flower and stem
Inks - Versafine and Studio G
Paint for leaves - Niji Pearlescent watercolors
Embossing powder
I struggled with this card, I must admit and was a bit thrown off that the red ink looks so much darker on the blossom than on the Hello sign but I think it works!  I really like the pearlescent watercolors - I’ll definitely be playing with these in the future.  I was told they do “magic” on black…

Friday, July 27, 2012

Charisma Cardz Challenge 29 - Monochrome!

My sister and I decided we might venture into new pastures and try out a challenge we’ve never done before.  After doing a little hopping around the net we were inspired to give Charisma Cardz a whirl today.  Here is the theme for this week:

Charisma Cardz Challenge #29

MONOCHROME

Yep that's right! we'd love to see all your wonderful creations this week with something you have with the theme monochrome (same shades of one colour) !

I made this card:

Charisma-Cardz-29_Barb-Derksen

Charisma-Cardz-29-close_Barb-Derksen

Supplies:

Designer Paper - Peasant Bobbin, Urban Window Collection

Stamps -              Thanks 2 You, Stamps of Life

                             Daisies 2 You, Stamps of life

Goosebumps Shimmer Spray

Fairy Dust Glitter

Bow and Ribbon - a bit of sheer and a piece of salvaged raffia

This card was fun to make.  The florals are actually two separate stamps with both being the stalks and blossoms together but I used circles to “pop” out the tops and then drew focus to them by treating them with Goosebumps Shimmer Spray and sprinkling Fairy Dust Glitter into them, being as these are two items we picked up on the weekend and promised we would play with. 

Blogger Labels: Charisma,Cardz,Challenge,Monochrome,Here,theme,card,Supplies,Designer,Paper,Peasant,Bobbin,Urban,Collection,Thanks,Life,Daisies,Goosebumps,Shimmer,Spray,Fairy,Dust,Glitter,Ribbon,piece,tops,items,pastures,creations,week

Thursday, July 26, 2012

Less is More Week 77 Challenge

Not often lately I’m inspired to make two challenge cards back to back, but this happened today.  I decided to hunt out a new challenge, something fun and fresh.  I came up with the Less is More

This week’s theme:

Week 77

Theme week once more and this time it's

SEWING

For this it could be machine or hand sewing.. faux or stamped... you could even use sewing related images... just let your imagination roam!

Here’s my creation!

LIM77_Barb-Derksen

Unfortunately I do not know the name of this great paper - it practically made the card just by trimming it down.  I wrote the sentiment by hand and drew in the swirlies.  I may color some of the leaves with gold glitter yet, we will see!  I finished it off with some sewing - freestyle which is all I know, I’m sewing machine illiterate but learning all the time. 

Thanks for visiting!

Blogger Labels: Week,Challenge,theme,machine,images,imagination,Here,creation,paper,card,sentiment,gold,Thanks

Merry Monday Challenge

I had a wonderful day (I could also use the words blissful, fabulous, exciting, groovy, moving, joyful, sweet and on and on) yesterday visiting family and craft shopping.  Ok, family definitely makes the top of the list, craft shopping second, but mix the two and hola hola you pretty much put duct tape on my mouth and nail my feet to the ground!  Had a nice lunch with my sister, our daughter and my brother and my sister in law!

We shopped at a couple of stores in Kelowna, Ever After and then Memories and More.  Both stores are impressive and each offer something slightly different.  I bought many necessary supplies and a few new items to try out but I have to admit the one thing that was really satisfying was finding the square strip to fit my Fiskars Rotary cutter at Ever After.  My last one was over used and warped and I was unable to get a nice clean and straight cut.  At Ever After I happened to ask if there were strips for sale and not only did she have a strip, she actually has some cut custom and special out of graphite!  Turns out the Fiskars rotary cutter is her favourite but she had been unhappy with the strips as well.  She wound up experimenting with different materials until she hit on the graphite.  Its wonderful, I’m noticing a total difference already.  Good functional supplies are the bedrock of good card making!

As I always toss some Festive themed papers in my basket (because last year I didn’t buy nearly enough and its not like our small town has any place to run out to at the last moment) I was eager to play with a Christmassy theme.  Nina suggested we try our hand at a Merry Monday Card.

I chose:

Here’s my (oh so FUN!) take:

MM17-1_Barb-Derksen

I used:

Designer Paper:  Dots and Stripes by Echo Park

Stamps:               Stamps of Life - Owls to owls2love

Elements:             Hat - I cut this freehand

                             wHO - I designed these in my Silhouette SD software and used the sketch pens to draw the wordart out. 

                              Pearls - Crystal Stickers

MM17-2_Barb-Derksen


The fluff for the hat trim is a cleverness from Nina who pulled the end off a QTip and stretched it out.

MM17-3_Barb-Derksen

I love the little popped out eyes! 

Hey, what are YOU doing this week - still time to get in on the Merry Monday Challenge fun!

Last minute note: 

Visit KELLY!

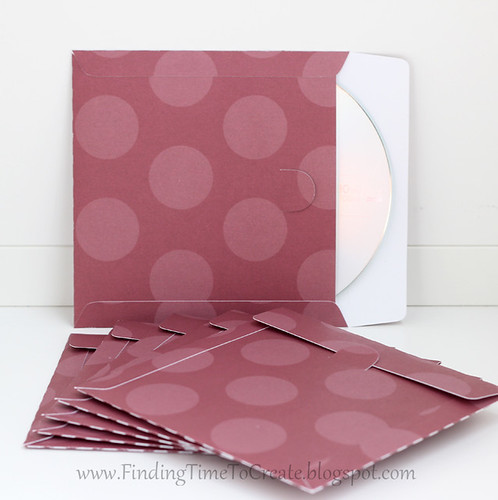
I just visited Krafting Kelly’s blog site and she has a FREE .studio file to make your own paper CD cases!  Gotta love this, especially nice it will fit on my Silhouette SD as well as the Cameo - thanks Kelly!

Blogger Labels: Merry,Challenge,words,duct,daughter,stores,Kelowna,Memories,Both,items,Fiskars,Rotary,cutter,strips,sale,custom,difference,bedrock,card,Festive,papers,basket,moment,Christmassy,theme,Nina,Here,Designer,Paper,Echo,Park,Life,Owls,Elements,freehand,Silhouette,Pearls,Crystal,QTip,Last,Visit,FREE,studio,cases,Gotta,Cameo,feet,Stripes,Stickers,hola,sister,graphite

Monday, July 23, 2012

Poor Mr Skunk


Skunk-Face_Barb-Derksen

My Mr and I walked the hike and bike yesterday and what did we see but the strrraaaaaangest thing.  Made me think of “he laughed his face off!”  This was all that was left of Mr Skunk, other than a few pitiful tufts of black  and white fur bits in the gravel.  Oh my!

Blogger Labels: Poor,Skunk,hike,bike,Made,tufts

Sunday, July 22, 2012

NEVER STOP…


Doing random acts of kindness:

parking-lot

Dragged my bummy out of bed at 6:30 on a Saturday to sweep and de-weed a HUGE parking lot - just COZ!  

You think  you do RAK’s for someone else but it always makes a positive change in your heart and mindset.  What will YOU do for someone else today?

Wear pretty things - experiment!

Necklace Bracelet (2)

Take a necklace and turn it into a “rainbow throwing” bracelet!

Play with your food:

13-July Cherries and Necklace (23)

Thread 5 pitted cherries onto a popsicle stick, freeze and voila you have “Cherry Pops”  - drizzle with chocolate if you feel decadent!

Be a kid!

Cherry-Ear

Take the “7th” day a week off:

In Scripture for a reason - we all get on the “gerbil wheel” all to easy and it’s hard to get off.  Take a day to relax, restore and draw closer to God!  The scales will fall from your eyes and it will give you a whole new outlook with your heart as well as your eyes!

Blessings!

Blogger Labels: STOP,HUGE,heart,mindset,Wear,Take,necklace,bracelet,Play,food,Thread,Cherry,chocolate,Scripture,outlook
Technorati Tags: ,

Friday, July 20, 2012

Playing in Paradise Challenge #76 and a FREEBIE!

Oh my, I’m late I’m late - and so embarrassed.  I was invited to be a Guest Designer here this week and I knew this but got my dates mixed up.  My Sister Nina was counting on me but I don’t think she’ll beat me up too much for messing up *wink*

But I’m here with my card for this week’s Playing in Paradise Challenge #76.  This week’s


Ohh lala, I love a project which is tactile and so I took this challenge to its full advantage and created my card which has lots to feel as well as to see. 

PPC-76-a_Barb-Derksen


PPC-76-b_Barb-Derksen

Go ahead and touch my tissue paper clouds glued onto my hand painted  watercolour background! 

So here’s how I made my card:

PPC-76-Tut1_Barb-Derksen 

I chose this paper because it has a nice “tooth” to it, very fiber-y?  I was going for tactile as much as looks.

PPC-76-Tut2_Barb-Derksen

I always figure if I’m going to make one card its just as easy to make two.  I cut the paper an inch bigger on each  side than what my 1/4 fold card would measure out, so I have room for the tape.  I taped my paper down to a plastic coated board. 

PPC-76-Tut5_Barb-Derksen

I mixed up some russian blue watercolor.

PPC-76-Tut4_Barb-Derksen

I wet the paper liberally with plain old water.  Don’t miss any spots - you can tilt the board in the light and you will be able to see any dry patches (ha, here’s me who wound up with a bit of dry patches along the side)  We are going for a graduated wash of blue.

PPC-76-Tut6_Barb-Derksen

Simply “drop” the blue paint in along the top edge, then pick your board up and tilt it every angle to make the watercolor where you want it to go!  Don’t be afraid, you really can’t hurt anything.

PPC-76-Tut8_Barb-Derksen

Once you have the paint the way you want it then you can “lift out” some clouds - using a paper towel or tissue paper, gently press into the blue paint and it will suck up the blue and you will have a white “cloud” left over!

PPC-76-Tut7_Barb-Derksen

See?  Now we need to dry our paper before beginning the next steps.  You could leave it out and let it dry in the air but I wanted to hurry hurry so I used:

PPC-76-Tut9_Barb-Derksen

My heat embossing gun - though you can also use a hair dryer.   While your paper is wet it will feel “cool” to the touch of the back of your hand (don’t put your fingers on - the oils in your fingers can wreck your painting sometimes or even leave smudges)  So when it no longer feels cool it should be fairly dry.

PPC-76-Tut11_Barb-Derksen

And since I did not air dry it, which would have left it laying nice and flat, I decided to iron them to flatness.  I could have left them “as is” for a nice painted, cloudy background but then I wanted to add the “Fuzzy” feel to my cards, so I decided to make the clouds 3D-ish.

PPC-76-Tut10_Barb-Derksen

I added some good gollops of glue…

PPC-76-Tut14_Barb-Derksen

Shmooshed on some tissue, then added a bit more on any raggy edges overtop. 

PPC-76-Tut13_Barb-Derksen

Drew in a “bird” using a black marker and finished the background with some “sand” made from a sheet of cork. cut

Next I used my Silhouette SD to cut all my elements using my own Shovel and Pail design.  (Note: with the shovel I did not make a “cut-line” in loop at the top of the shovel because I figured you can easily cut it yourself if you want to “loop” it around the pail handle, but if you want it separate from the pail you would not want a ‘cut’ there. 

Won’t you join in the fun for challenge #76 at Playing in Paradise?   There are some beautiful and creative samples the design team have already posted to inspire you!

There are always lovely prizes to be won - The prize for PPC #76 is Glitz – Happy Travels Clear Stamp, Chipboard Album approx $25 (sweet!)

I was chosen winner of PPC #74 a short time ago and this is what arrived in my mailbox today!!!

Looty-Booty_PPC

I am SO EXCITED to start playing with this gorgeous looty booty!  Thanks so much PPC!

Ah yes, and as promised - here’s the files for making the Pail, Shovel and Word Art.  I’ve saved them every which way for your convenience, whether you are a digi-scrapbooker or Sil or Cameo cutter:

PPC-76-c_Barb-Derksen

Pail-And-Shovel-PSD-PNG_Barb-Derksen

I’ll keep the cuts coming, if you can donate just a dollar or two that’s SO NICE, but if you truly can’t that’s fine too.  It takes me quite a bit of time to design and package all these goodies but I do it in faith!

DOWNLOAD

Personal Use

Thursday, July 19, 2012

My Latest Greeting Card - Mojo Monday Challenge #250

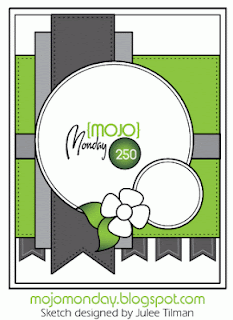
I decided to jump in on the fun and create a card for Mojo Monday.  I’ve missed a few lately and though this was a complex sketch I discovered I really was “up for the challenge” Here’s this week’s sketch:


And here is how I interpreted it (with a few liberties I took with changing the shapes of some of the elements)

Mojo-250-b_Barb-Derksen

Supplies:

Designer Paper - by Sarah Milne  scenicroutepaper.com

Stamps - Studio G


Mojo-250-a_Barb-Derksen

I actually pulled this crochet flower off a pair of jeans I’d bought at the thrift store for 50 cents.  They had pretty flowers like this in several places but the jeans looked a bit juvenile on me so I picked the flowers off and they make perfect accents.  I have another project for the jean material!  I added this gem in the center to finish the card off. 

Won’t you come join the Mojo Monday challenge too?

In case you arrive here and can only view this post, you may want to visit yesterday’s post to catch that latest freebie and a super simple and delicious recipe for “Cherry Pops”

(psssst - a new freebie coming up in the next day or two!)

Wednesday, July 18, 2012

An Award, a Recipe for Cherry Pops and of course, a FREEBIE!

I hope this week finds you enjoying summer to the fullest.  Its nice to be in full-on vacation mode if you’re able.  I also like to “flip the coin” emotionally, meaning when I feel so happy, so richly blessed I draw my mind to the fact there are many people who are NOT having a good time - indeed there are many hurting and suffering people all around us who we could overlook. 

I ask you today, would you try one small thing today?  Its something you will do for someone else, but trust me, you’ll wind up being blessed yourself through it. 

Choose someone in your life or someone you know who’s going through a tough time or just needs a friend right now and do something nice for them today.  Why not crack out a pen (the real kind with ink in it and everything) and share some kind words with them.  Or phone someone up and say hello. 


So I wrote a little letter

To a friend distraught with grief,

And the writing of that letter

Warmed my heart beyond belief.

Though my own heart had it’s sorrow,

Yet I shared another’s load;

Lo, a miracle! that sorrow

Led us to a sunny road.


a


I’m saying thank you so much for my first donations - it really means a lot to me.  Even small change haha, quarters, nickles, dimes and pennies (while they still make them, anyways) donated via the button on my sidebar do really help with my crafting supplies which causes me to make more FREEBIES for YOU (then I feel compelled to create from the files I make)


Barb-Derskin-Silhouette-Angel

I’m also thrilled to have been named as a Silhouette Plus Angel at the Silhouette Plus forums.  I take it this means I’m a nice girl who is kind to others and that everyone really appreciates my contributions in the way of .studio files… and it means that I ♥ my Silhouette family so much.  I’ve met the nicest people there and learned a ton.  You should check it SPF out!  Thanks to all of you!


I also have to extend a special THANK YOU to Tobias and the team at GE.TT for giving me extra space for storage so I can share my files with you.  GE.TT is a perfect place to share your files, photos etc.  A basic package is FREE and there are no ads or downloads presented to those you share your files with.  A VERY cool feature of GE.TT is that you can actually share files while they are uploading! 

g


I’ve added a new pages tab to the top of my blog - RECIPES.  I love to cook up new and healthy dishes and treats and so this will be a nice way to share these with you. 

I’m all about cherries these days - they are in full swing and so I’m making the most of them.  Here’s a fund and refreshing and super simple idea I came up with:


CHERRY POPS!

blog-ready

The cherries this year as so big and fat and luscious they inspired me to make my own healthy “pops”   It occurred to me I’m always seeing fruit pops in the grocery store and I’m always very aware of making sure they are made with real fruit and so it hit me that I can make my own. 


blog-ready4

I took a tall stir stick, though a popsicle stick would work well, or a chopstick even.  Pit the cherries and simply slide them onto the stick.   Lay them flat onto a piece of parchment paper and freeze.  Simple as that!

♥♥♥

Here are some health facts about cherries you might not be aware of:

(via Dr Heidi Rootes)

1. Cherries, known as a “super-fruit”, are packed with antioxidants called anthocyanins which aid in the reduction of heart disease and cancer.
2. Cherries are one of the few food sources that contain melatonin, an antioxidant that helps regulate heart rhythms and the body’s sleep cycles.
3. Cherries are an excellent source of beta carotene (vitamin A). In fact they contain 19 times more beta carotene than blueberries and strawberries.
4. Cherries are rich in vitamins C, E, potassium, magnesium, iron, folate and fiber.
5. Cherries are referred to as “brain food”, aiding in brain health and in the prevention of memory loss.
6. Because cherries contain anthocyanins, they can reduce inflammation and symptoms of arthritis and gout.
7. Eating cherries reduces the risk of diabetes.
8. Cherries are a good source of fiber which is important for digestive health.
9. Cherries are a great snack or dessert choice important for weight-maintenance.
10. Because of their powerful anti-inflammatory benefits, cherries are said to reduce pain and joint soreness for runners and athletes after workouts.


blog-ready2

And if that’s not deliciousness overload itself to you then you may want to add a swizzle of chocolate syrup or melted chocolate onto your frozen pop and then freeze it a bit more.  Oh my GOSH!  Its so good. 

I’ll be adding this recipe under the RECIPES tab at the top of this blog in the next day or two in a downloadable pdf format. 


g

And now to wind up, here is my latest card and the fun Word Art cutting file to go with it!

Stacked-Happy-Birthday-WA_Barb-Derksen

Here’s how I put the cut word art together:


1-Glitter-Word-happy-birthday-1

I take the inside cut of the word art and I add a coat of glue stick to it. I recommend you make your inside cut a color close to what your glitter will be because you won’t get a perfect coat of glitter )unless you go the route of using sookwang adhesive sheets and glitterritz glitter).  This way if any spots are missed the solid color of the background will help. 

1-P7170213

My sister showed me that its good to use a coffee filter to do your glittering on - it allows you to fold it up after and funnel the unused glitter back into its container.  Generously coat your word art.


1-P7170214

Now here you can employ a couple of my favorite helper items.  I ♥ Tombow mono glue.  It has a teeny tiny flow pen cap which allows you to glue the finest of items.  And I can’t live without my seam ripper.  I use my seam ripper for EVERYTHING.  It helps me hold down delicate things such as this word art, while I add the glue.  It is perfect for prying up delicate items off of my Silhouette mats.  It is PERFECT for nipping the coating off of double sided tape on my cardstock!  

What’s your favourite “go to” tool which was never created specially for a specific job?


Stacked-Happy-Birthday-WA--sm_Barb-Derksen

Now you just glue your top layer of word art onto the bottom!  The color combo is up to you.  I added a gem to top the “i” in Birthday. 

DOWNLOAD

Personal Use

g
Total Pageviews

Popular Posts