Showing posts with label card making. Show all posts

Friday, January 10, 2014

The Card Concept Challenge - No 1!

It sure feels good to be taking all these challenges already this year.  I did not do that much at the end of last year.  It is also exciting to try a new challenge and today’s Card Concept Challenge #1 came together nicely for me:


The styles are divided into 6 style themes:

  • Clean & Simple (CAS)
  • Clean & Layered
  • Clean & Graphic
  • Freestyle Collage
  • Shabby Chic
  • Classy & Elegant

I am choosing to make mine in the category of clean and layered

CCC1_Barb-Derksen

SUPPLIES:

Designer Paper - Garden Party by DoveCraft

Strathmore Pastel paper

Image - Graphics Fairy

Grommets - Reflections

Scallop Cut - Barb Derksen

Text - Silhouette Sketch Pen

Ribbon

1-small-thing

1 small thing is a little tidbit I will share each time I post. 

It will be a totally random thing - a recipe, tip, idea, craft, thought, photo.

Today’s small thing is:

onion

Grow Your Own - Green Onions

Instead of keeping these hidden away in the bin in the refridgerator, put them in a window (hopefully you have a nice window in your kitchen) and allow them to get roots happening.  Next, plant them in a pot and you will have Green Onions for your stir-frys, salads and cheddar baking powder biscuits and… well, YOU get the picture!

Thanks for visiting!

Wednesday, September 11, 2013

Chip Bag Flower Card

You read that right.  Part of the following card is made using a bag from chips… potato chips/crisps - whatever you call them where you are. 

Chip-Bag-Card1_Barb-Derksen


Supplies:

Designer Paper - (cardstock) Hero Arts - Hero Hues

Stamp - Fiskars

Chip snack bag

Pen - Gelly Roll - Clear Star

Embossing folder - Cuttlebug

Glass Beads

Modge Podge


I despise throwing away chip bags.  I will often save them for at least marinading food, they work perfect for this.  I like the shiny inside though, too and considered how I might at least get ONE extra use out of them.  Do you know that if you hold them close to your eyes you can actually see right through? (looking at a bright light or the sun) 

At any rate, I decided to make sort of a window card using a flower cut as the window and the chip bag as the backdrop inside this.  I designed and cut the flower shaped 4.25 x 5.5 card face and a small 1/2 inch circle of the designer paper.  I washed the bag, dried it and cut a square big enough to fill the flower with a little extra room for taping it down. 


Chip-Bag-Card3_Barb-Derksen


After I secured the chip bag foil down onto the card base (positioned where the flower would be) I added the card face cut onto that with glue and tape.  I added the center circle in.  Next I brushed the silvery petals with Modge Podge and sprinkled it liberally with teeny glass beads.  I let this dry. 

I added on the silver gem in the center and finally…


Chip-Bag-Card4_Barb-Derksen


I added a sentiment and, the last touch was to take the Clear star Gelly Roll pen and connect some of the swirls in the cardstock pattern to pull the sentiment together with the flower in the middle.  Its sometimes the littlest touches that “make” the card. 

I hope you’ll visit again - there are photos and inspiration daily and a project every third day.

Saturday, September 07, 2013

“Such a Deer” Card

I bought this sweetest designer paper when my sister Nina was visiting this summer and knew right away that I wanted to do a deer theme. 

Such-a-Deer1_Barb-Derksen

Isn’t this deer just so… durn DEAR???

Supplies:

designer paper - KaiserCraft “Tiny Woods Collection” 

cardstock - We R MemoryKeepers

canvas

tiny “googly” eye


The KaiserCraft paper is one printed with various cute critters on it so I trimmed out the deer first, matched it up with the random floral print scrap I had from another project - selecting all papers I wanted to use. 

Such-a-Deer2_Barb-Derksen

I trimmed the floral DP with a deckle blade on my Fiskars Rotary cutter.  I trimmed some canvas type material to make the DIY “bow”. 

I created the font sentiment in my Silhouette Designer Edition Software and made my Cameo do my bidding and print it to JUST the right size.  I cut another bit of cardstock (might even be a paint chip, I use those a LOT because you can get JUST the right shades to go with ANY project) 

Such-a-Deer3_Barb-Derksen

Then I glued some, sewed some etc to assemble - added foam tape to the back of Bambi and stuck him on and well… AWWW! 

Thanks for visiting and stay tuned for another project in 3 days!

Wednesday, September 04, 2013

Brilliant Lollipop Themed Card & FREE .studio Cutting file!

I’m just a “sucker” for simple and bright card and I am on a real kick for using vinyl lately so I decided to try out a simple design I had in mind. 

I am the queen of frugal, (because I choose to stay at home and try to live out my dream to create, create and create but it does not make me rich by any means)  When I make it to “real” high end craft stores I can often but drool over some supplies I’d like to have but accept that within my budget its not going to happen.  Out of this is born so many of my greatest ideas and designs. 

One of the wonderful things I felt attracted to in the stores were the Elizabeth Craft Designs Peel off Stickers.  They are fun and wonderful and I totally think they are worth the asking price.  I have bought a few packages when my Mr. came with me and he said I should treat myself. 

They are wonderful to stick and fill with ultra fine glitter or even just paint or ink.  But there are two limitations I found (besides the price for me)  The first thing is they are all sort of the same size - so here’s me who likes to custom tailor almost everything…

and the other thing is there are only so many designs (which are very nice, indeed) but again, I’m a rebel and I like a huuuuuge variety and I like to size it to fit whatever project want to do. 

So… I have been playing around with vinyl! 

Supplies:

Designer Paper - I used a Colorbok Specialty Paper Pack - Bright

Watercolour paper - Arches 140 lb

Vinyl - black

Ribbon - random


Lollipop1_Barb-Derksen

Lillipop Card

4.25 x 5.5 inch


Ok, so I’m telling you right off the bat my card is not warped, my photo of the card is warped… and I’d given the card away in the meantime. But you get the picture (pun intended) 

I designed this simple vinyl cut, and I use a high quality watercolour paper to transfer it onto - 140 lb arches in this case.  I cut the vinyl image, then I “weed” out the bits I don’t need and I use Contact Paper (the clear kind you can line shelves in your kitchen with) to transfer the image to the arches paper.

You must work delicately but you definitely get a pretty fine image!  I save (and have friends save) old credit cards or gift cards that have been used up and use them to smooth my vinyl over the paper.  First I position it over the paper where I think I would like it and then I fix one end down and slooooooowwwwly stick it down to the paper, all the time smooshing it in a straight path with the long side of the credit card.  After you have done it a few times and you gain confidence it becomes easier.


Lollipop2_Barb-Derksen


Once you have the vinyl outline stuck on then you can paint.  Now, once again I must stress that your finished product is only as good as the materials you use - and so in this case, though you will pay a healthy price for both arches paper (though it cuts down into many MANY projects) and a good set of watercolours or watercolour pencils - I believe these are essential.  The colors are so brilliant! 

I like to use an aqua brush, it means you don’t have to constantly rinse brushes out etc.  I simply swipe mine on a rag in between colors. 

I began painting in the middle and worked out, changing colors and blending them together into a little bit of an overlap to achieve a rainbow effect. 


Lollipop3_Barb-Derksen


The finishing touch is a pretty pink bow, a perfect touch for a sweet little girl. 

You might also (which I will be showing in an upcoming tutorial, use fine scissors and trim around your lollipop - turning it into an element which you could then “pop” up with foam tape. I have created this file to be sized for a standard 4.25 x 5.5 card, if you were to make “elements” from this file the vinyl might get pretty tiny to work with.  You may have to experiment.

I sincerely hope you enjoy this project.  I’d love to see what YOU make and feature your project here on my blog Smile

LOLLIPOP .studio FILE

(personal use unless you seek permission from me for any commercial use)

DOWNLOAD

Tuesday, August 20, 2013

Bike Birthday Card - FREE cut file and link to svg!


Yes, I’m playing with vinyl once again.  I just find it so versatile that I can’t stop using it for new projects.  Here is my latest:

Bike-Birthday-Card1_Barb-Derksen

4.25 x 5.5 inch card

Supplies used:

Chalkboard vinyl

Cardstock - medium weight, white

Designer Paper - Hero Hues by Hero Arts


Method:

I searched online and found this bike svg through Wikimedia Commons (which you can get by going HERE)  If you use this file, even from me, please link back and credit to this link.  I’m including it in my cut files because I’m also giving you both “offsets” to go with it and it will be perfectly sized for a 1/4 fold card. 

I traced the svg and sized it.  Then I used the OFFSET feature to make a backdrop to the bike as its sort of thin and spindly and we want the focus to be all about the bike.  I have located a youtube video on how to use the offset feature in Silhouette - you might want to check it out HERE so you can learn too!  Once you get your mind wrapped around it, its really quite simple and effective.

Bike-Birthday-Card2_Barb-Derksen

So I cut the bike part out of chalkboard vinyl, then the smallest offset from white cardstock and the final offset from the original designer paper. I smoothed the vinyl onto the white offset then glued this to the final designer paper offset.

I tacked foam tape to the back and fixed it to the card base in the middle. Simple but effective.  I also cut teeeeny tiny lettering for the “happy birthday” (which you can easily make using the text tool and in the font you want)  and adhered it.

Bike-Birthday-Card3_Barb-Derksen

And I just couldn’t resist adding this little sentiment - again in vinyl, to the inside of this card. 

I hope you enjoy this file - I’d love to see what YOU make and even feature your project here on my blog. 

Bike with Offset

(.sil file)

DOWNLOAD

I hope you’ll come back in three days to see another cool (and unique AND recycled)  project I made using the bike shape!

Tuesday, August 13, 2013

Friday Mashup 122


UPDATE

Yayyyyy - I ROCKED the mashup 122 and now my sidebar is sporting the “I Rocked” sticker thing.  Too cool, seeing as its been forever since I took part in a challenge.  Thanks to the design team for selecting me.  Star

Its been a while for me to take up a challenge and my sister Nina said SHE was going to do one …  and the hankering got to me so I whipped together a Friday Mashup card:

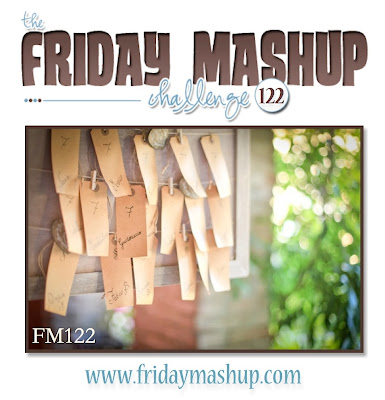
So, this week it was all about TAGS.  Here are the choices we were given:

  1. Create a project with a "Tag (as an embellishment on you rproject or as the project itself )."
  2. Create a project using the colors "Crisp Cantaloupe, Soft Sky, Primrose Petals & Bermuda Bay".
  3. Or Mash it Up and create a project "with a Tag using the color combo above".


And here is what I managed to do with that:

FM122-1_Barb-Derksen

So, that was about as close as I could come with the theme and the colors.


Supplies:

Cardstock - Hero Arts - Hero Hues

Cardstock - We R Memory Keepers - textured cardstock pad

Tag

Stamp - Studio G

Embossing Folder - Anna Griffin - Foulard

Circle Doilies2 cutting file by Bird

crochet thread

Method:

I cut a cardstock face to 4.24 x 5.5 inches and embossed it. 

FM122-3_Barb-Derksen

The tag, now that’s a funny story, my sister Nina gave it to me from a clothing item she bought.  I saw possibilities right away, just was not sure when I would use it.  Once I saw this challenge I knew this was it. 

FM122-2_Barb-Derksen

I painted the tag over the logos using a warm white acrylic and let that completely dry. I stamped it with the birthday greeting.  I was happily surprised how fine it is to stamp onto canvas! (filing that info away into the creative tools portion of my brain)

Next I cut out Bird’s GORGEOUS Doilys2 file to the size I wanted, leaving a bit of space on either side so that I then cut a simple scallop out of the peachypink cardstock and layered it behind. 

While cutting those two items out I used Flower 1021 and Flower 1022 from the Silhouette online store.  I designed a hole into the middle of each, sized them three different sizes.  They are about 3/4 to 1 inch. 

FM122-4_Barb-Derksen

I designed my own little “anchor button” and cut out two for each flower.  Then I threaded up a bit of crochet thread and I threaded it through one side of the button, down thru the flower, out through and back the second button and all the way back to the other side of the first button so that I could anchor the flower together and be able to make a sweet little bow in the middle of each blossom. 

Then I assembled the whole works with glue and glue dots and foam tape in copious amounts. 

I’m providing the little anchor button for YOU to download if you wish.  This is sized tiny for small flowers but if you’re an experienced Cammy-user you could easily resize (keep in mind to ungroup and only expand the OUTSIDE so the holes stay nice and small) 

Anchor Button

DOWNLOAD

Do you wonder what Nina’s card turned out like? click HERE


to see!

Sunday, August 11, 2013

Fun 45 Record Card - FREE Silhouette Cut file!

We know someone who ♥ records and so when his birthday rolled around I decided to theme a card around his passion for “vinyl”.  I’m not, of course, talking about vinyl as in the stick on type - but the kind of vinyl we all used to listen to.  I’m aging myself here, ha ha!

45-Record-Card1_Barb-Derksen

I had SUCH FUN with this one and I hope you do when you use it too.  It is a tricky project if you have not used the Silhouette Sketch Pens before.  If this is the case then you might want to use the blank template I’m including and then just add your own stamped or hand drawn touches to it. 

We will use the (black) “record” part first.  Drag all files except the large record part off of your cutting area in the software.   First you will make the “rings” - they are simply lines drawn using a silver Silhouette Sketch Pen. Load a piece of black cardstock into your machine and a Sketch Pen into the holder. 

After you’ve sketched in the lines you will need to ungroup the cutting file (ctrl + u) and then select and delete all the inner lines -but not the outside line and then cut the shape out (I used the cardstock setting)


45-Record-Card2_Barb-Derksen

Now it’s time to work on the inside piece.  Load a piece of yellow (or whatever color you choose the middle to be) cardstock into the machine. 

Drag the smaller “inside” cut onto the cutting area.  If you are going to use the Sketch Pens then you will load that into the holder. Click on the file and ungroup.  Delete the outside line.  Now command your software to sketch (cut) the text. 

Once your text is complete, trade out the Pen for the blade and set it to the cardstock setting.  Now use the undo command (ctrl + z) to get the outside line back.  When you have this, then click on the text and delete it.  You will be left with just the outer line and you will tell your Silhouette to cut this.  Voila! 

I added a sentiment on the inside of the card which says “Hope you have a RECORD year!”  I hope you enjoy this file. You may use this file for your personal use.  If you would like to make cards to sell at craft fairs or on a small scale I ask you display a credit to me and a link back on my blog site.  If you want to use my design on a large scale I will need you to seek written permission from me. 

I’m always open to donations to offset the time and effort that goes into my designs so I can provide them often and at no cost.  Why not be a “Robin Hood” for others who may not be so fortunate? 

45 Record Blank File

DOWNLOAD

45 Record File - full file with sketch lines and text

DOWNLOAD


Blogger Labels: Record,Card,FREE,Silhouette,records,vinyl,Sketch,template,files,blade,sentiment,donations,File,DOWNLOAD,cardstock

Thursday, August 08, 2013

Soda Pop Can Card - a highly experimental project…

I get all these crazy ideas.  Well, probably we all do, but I kind of take them and run.  Take for instance this crazy card I made:

Soda-Pop-Card1_Barb-Derksen


Seriously, I’d go to sleep at night thinking about this card idea.  I’ve been on a bit of a brain binge on ideas to recycle, re-use, up cycle… whatever you want to call it. I discovered I could easily cut a Soda/Pop Can/Tin (some differences in what you call it if you are from Canada or elsewhere) into sections and I’ve used the other bits in a myriad of projects but I was hankering to use that top for something profound. 


Soda-Pop-Card2_Barb-Derksen


I left a little length (about 3/4 inch) on the top and cut little slashes all around so that I could then  lay the pieces flat and use them as an anchor behind the card face. (I had to hammer them nice and flat)  Yes, I invested quite a bit of time designing and cutting the face hole so the can JUST fit in snug.  Then I glued it in positon and stuck it to a cardstock 1/4 fold card base. 

Then it was the fonts, I used some black vinyl and made the tedious teeny-tiny letters and then the glitzy FIZZ letters cut out of glittery cardstock which I stuck on then drew in a shadow using a black sharpie.


Soda-Pop-Card3_Barb-Derksen

Then I had to make the “glass, and the “Pop” itself.  The glass was made from some Glossy Accents …

Soda-Pop-Card4_Barb-Derksen

The pop is some glittery Modge Podge my sister Nina left with me.  That stuff has been used for quite a few highly experimental and exciting projects since.

What’s the most unusual item you’ve used in a project?  Was it a success or fail?  I spent a great deal of time on this card, but I think even for the fun factor it was totaly worth it.

Soda Pop Can Card - Girl with Birds

Anyone who knows me is pretty used to me getting excited about trash.  Um hmmm - I see treasure in the most odd bits of things most people toss out without a second thought.  I’ve pulled out all the stops with my creativity this past year and I have challenged myself to “think OUTSIDE of the box” so to say.  The recycle bin at our house has become my art supplies box and I think you might be pretty impressed when you see some of the unique projects I’ve dreamed up. 

Today I’m going to feature a card I created using the Girl with Birds (FREE) cut from my previous post. 

Soda-Can-Card-1_Barb-Derksen

This card is what I term as a “giving” card - in other words, you would not want to mail this as its very 3 dimensional. 

Soda-Can-Card-3_Barb-Derksen

The girl and birds are teeny tiny vinyl cuts and I’ve adhered them onto… can you guess?  It’s the inside of a soda pop can! 

I have been experimenting with pop cans for a while now and I’m finding there are many fun uses.  I don’t have a photo of how exactly I did this but basically I cut both ends of the can off.  I allowed about 1/4 to 1/2 inch of leeway on both ends so that I could make small cuts all around.  This allowed me to then flatten the edge, all the bits, and they serve as an anchor.  I’ve reserved the top and the flat middle pieces for other projects. (woo hoo, stay tuned!) 

I decided to paint the can surface white - I used an acrylic but I think it would have been nice to use a spray paint next time.  When it was dry I stuck the girl and birds on, then coated it with a layer of Modge Podge which I sprinkled with ultra fine glitter.

Next I measured the can bottom (it was just over 2”) and designed a card face cut in my Silhouette software. I designed a simple scallop to fit around the edge. I added the stamped sentiment and layered it on some lovely designer paper from Kristin Cronin Barrow’s Boho Chic collection.  I made and glued the bow on.

Soda-Can-Card-2_Barb-Derksen

Then I pushed the soda can bottom into the card face and then glued the entire works to a cardstock base. 

Have YOU recycled anything unusual for a greeting card or project?  I’d love you to comment.  Thanks so much for visiting today - be sure to visit again soon as I have more blog posts queued up for you in a few days.  Smile

Blogger Labels: Soda,Card,Girl,Birds,OUTSIDE,FREE,words,vinyl,photo,ends,leeway,paint,layer,Modge,Podge,bottom,Silhouette,sentiment,paper,Kristin,Cronin,Boho,Chic,collection,Thanks,pieces

Sunday, July 15, 2012

I Scream, You Scream - Happy National Ice Cream Day & a FREEBIE!


I found out it’s national Ice Cream Day in the USA and well, this Canadian girl likes ice cream way too much not to join in on the celebration. 

I’ve taken the summer off from all commitments and I’m using the time to catch up on things and to create and enjoy the things I love to do most.   Lucky for me I am able to combine doing what I love with some of the things that need to be done, like build graphics for websites my Mr. has taken on.  It’s not going to get us rich but it is something we can do together and together is where we want to be. 

Speaking of getting rich, haha, my Mr. added a DONATE button onto my blog because he’s loving me being home and he also supports my making nice things to give away to you.  I spend quite a bit of time and effort in making my elements top-notch, (this Ice Cream elements set took me two full days!) so if you’re able to help out, a buck or two here and there would be oh so welcome!  If you absolutely can’t - no worries, I’ve been there before and been very blessed with the best designer friends in the world who gave me a helping hand when I started.  All the money I earn generally goes right back into supplies and well … I want a Cameo in the worst way!  I’d bet totally chuffed to “earn” it here through your generosity!  Cameo for me = more freebies for you.


If you’re a designer - I DO allow some commercial use if you’ve contacted me and I’ve given permission, details are included in my TOU.

Little note:

I won a Playing in Paradise Card Challenge - (hopping up and down!)  More to come when my looty arrives in the mail!  If you have not joined in the challenge before you should consider it, the prizes are fabulous!  Thank you to the PPC design team for hosting.


1-P7140182-001_Perfect365
Apricots are Ready!
here in the beautiful, sunny Okanagan, Canada


I enjoyed making last week’s popsicle file so much that when I heard about Ice Cream Day I decided to create an ice cream cone… and it turned into two versions. 

Card

Ice-Cream-Day-card_Barb-Derksen
Ice-Cream-Day-card-2_Barb-Derksen
Personal Use
Includes fully layered PSD, PNG layers
and .studio files and full cut-sheet.


As always, I’ll pop these files in some of my other “pages” tabs up top of the blog so you can ALWAYS find these files if you lose them.


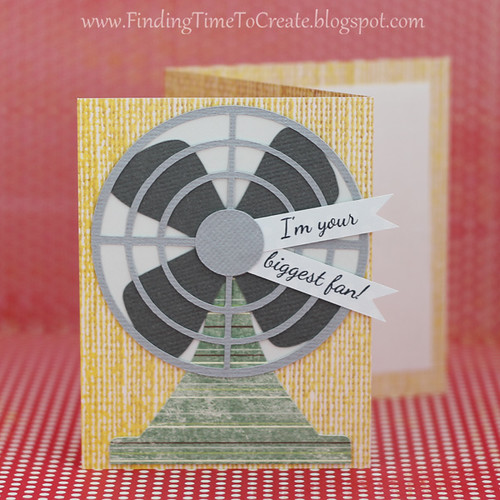
Another Little note - KELLY over at Finding Time to Create has a wonderful tutorial on how to make this sweet summer fan cut.  GO VISIT!

In case you might wonder how I create the “texture” on my elements I’ll tell you how I achieved the look for the ice cream and then the cones.

ice cream tut 1

I start with the plain shape of the scoop of ice cream png (it has a transparent background, imporant for this tutorial).  Then I went on the internet and found a free texture of cement.  I saved it then brought it into Photoshop and placed it on a layer above the scoop of ice cream.

ice cream tut2

Next I hold down the Ctrl key on my computer and click in the layer which has the shape of the ice cream blob.  This turns the shape of the ice cream blob into a “selection” 

ice cream tut3

A selection contains everything inside the shape. 

image

I want to get rid of everything that is outside the shape so I click into the layer that has the cement and then I go to the toolbar and choose SELECT and then INVERSE.  Now everything outside the shape is selected.  At this point I hit the delete key on my keyboard and voila!  Next I use the Ctrl + d keyboard shortcut to remove the selection.

One thing I always do now is to remove the color from the texture - I don’t want it to color tint whatever is on the layer below.

image

I do this by going up to IMAGE then ADJUSTMENTS then choosing BLACK & WHITE. When the instruction window pops up hit OK.

Now we are ready to blend this texture over our blob of ice cream. 

image

Next we go to our Layers panel, click the arrow for the drop down menu and choose OVERLAY.  Magic, huh? 

Ok, so now we have our ice cream the right color but its sort of “flat” looking, right?  Here’s how we will fix that.

image

Before we begin to alter the look of the Ice Cream, we need to merge the two layers together.  As in my illustration above, click the teensy tiny triangle and when the drop down menu is presented choose MERGE VISIBLE

image

See?  Now we have just one layer with a texture to it.  Lets go shade it a bit.

image

On the far left of your screen are your brushes and the tools.  Find the hand (about 1/2 way down) and click onto it.  You will get three choices, the DODGE TOOL, the BURN TOOL and the SPONGE TOOL.  We will be using the dodge tool and burn tool in this project.  Lets grab the burn tool first.
I have my brush size set to a fuzzy brush and it’s sized  at 78.  Now we just start “painting” onto the Ice Cream in the areas we want to darken.  These would be areas which fall into shadow. 


image

So, mainly around the edges, at the “waist” and under the ruffles at the bottom.  We could almost just leave it as is now, but just for this lesson lets change our tool to dodge and add a nice highlight or two.

image

There you have it!  If you have Photoshop you might want to try this yourself using the PNG in my Ice Cream Day Elements!

Note - for the cones, believe it or not, I used a fine, smooth cement texture.  The possibilities are endless.

Total Pageviews

Popular Posts