Monday, August 22, 2011

Two More Cards a Tip and a Free Studio Photo Corners File


HAPPY HAPPY BIRTHDAY to both our daughter Melanie today and also to my DEAR friend JanMary as well.  Mel does not keep up her blog but JanMary has a GORGEOUS blog (with all her tales, photos and fabulous jewelery designs!)  Won't you take a moment to visit her and leave some well wishes?

Still working hard to catch up on the 365 cards and it’s Mojo Monday too.  I’ll post the 365 first:
Day 171 – Vintage Plus Pink


365-Day-171-full

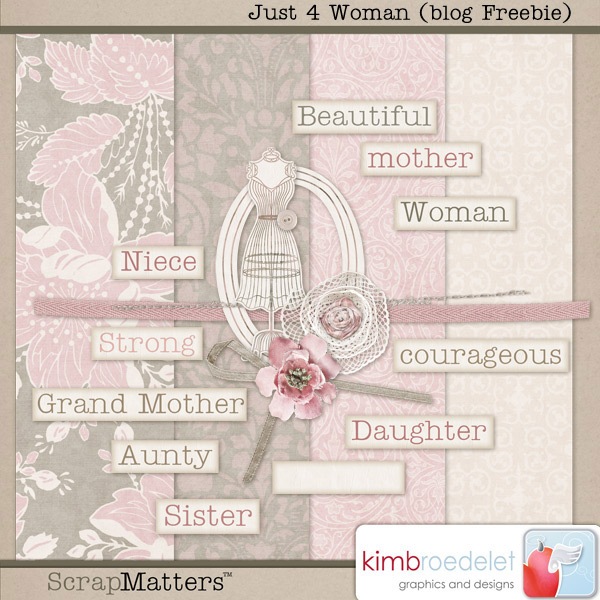
I used my friend KimB’s pretty “Just for Women” kit which is available for free on her blog site – the entire kit is simply gorgeous.  Click on the preview of her kit to be taken to her blog!


Kim is a designer of digital scrapbooking kits, and if you’re a carder who has never worked with digital kits – here’s the good news.  The kits consist of super high quality jpg and png files and you are able to bring these into your Silhouette software and trace the elements and print and cut!  The Silhouette cuts out very nicely! 


365-Day-171-close

Kim has a lovely shop with many MANY kits and she’s also very generous with freebies too.  Please leave her some ♥ if you download! 

I printed the paper out and then cut it.  I printed out the mannequin and the word arts.  I stamped the mannequin with my Versamark Shimmer Stamp and then I heat embossed it with a clear powder. 


Lace-Cut


My tip today is that you may notice I have lace behind the mannequin and I thought I’d share my secret to cutting the lace nice and straight – I run it right through my Fiskars Rotary slicer!   Quick, easy and accurate!


Mojo Monday 205


And my take:


Barb-Derksen-mojo-205_full

I used the last bits of my Moravia sheet of designer paper, thats the brown check and blue design (two sided)  I cut the Brown Suede out using a jaggy blade with my Fiskars.  Love this suede, just pretend you can run your fingers over this – so soft.  I chose these colors and textures hoping this would appeal as a masculine card. 


Barb-Derksen-mojo-205_close

I cut the blue embossed cardstock and then used a Fiskars border punch.  I then punched the holes and pulled the little tan dashed ribbon through.  I cut three cardstocks using my Silhouette SD and then stamped and inked the sentiment.  Last touches, sheer ribbon, frilly brown ribbon and then a bow of a mix of ribbons topped with a glue dot I made myself using my glue gun.  Yep, that’s another tutorial I will share one day too.  I think I’m going to have to start a “Tips” tab – what do you think?


Barb-Derksen-mojo-205_inside

And finally, I decided to squeeze out the last weensy remnant of nice paper so I designed some “photo corners” to decorate the inside of my card. Just dresses it up a bit.  If you have a Silhouette –just click on the graphic of the inside of my card to download the .studio  file for these corners – enjoy!


Sunday, August 21, 2011

MORE cards and an AWESOME, AMAZING FREE set of cutting Templates for YOU!


I always think that I will be able to shoot out one small short post but it never works out that way.  I guess when my creative spirit kicks in I just stick with it until its worked out.  So today I have three cards to share and also a FREE set of templates for YOU that, if you make greeting cards,  will make your life easier – I guarantee it!  First, to my cards – can’t let my sister Nina get ahead of me.  A little sibling rivalry is safe now she’s not here to give me a noogie or “the look” anymore.  I ♥ her style and have learned a ton from her. 

I’ve been trying to play catch-up with my 365 cards so these are all from their site:

Day 172  Vintage Plus Green


365-Day-172-full

This is a very simple card – it pretty much fell together.  The lovely graphic is from Graphics Fairy – such a soft and pretty image.  I’m sorry I do not know the name of the paper design.  I layered some rough textured almost hand made feeling paper over the background.  I added a filmy green ribbon over that and matched it with a thin mauve ribbon to reflect the color from the image. 


365-Day-172-close

I paired two blossoms matching the general color theme and then topped this with a button and knotted a snippet of fancy thread. 


Day 173 Vintage Plus Yellow


365-Day-173-full

This is a really “free-style” type card.  I grabbed the beautiful cut-out files from the Silhouette Plus users forum along with some other fabulous files which somebody put up for grabs for us “newbies” to the site.  WOW!  There are some very talented ladies out there, very generous. 

I cut this file out this “Tri Frame and Leaf Flourish” file using my Silhouette SD.  I glued the frame directly onto the background paper.  I inked the edges.  I added my own calligraphy touches.  I used my Versamark Shimmer pad on the leaves and then embossed them with a clear powder.  Thats it!


Day 174 Super Sketchy Sunday


Here’s the sketch for this challenge:


And here is my take:

365-Day-174-full

I ♥ this designer paper – Quite Contrary – Jack & Jill “Favorite Thing” Colorful Umbrellas Paper.  Its a double-sided paper with fabulous “tooth” to it.  These more expensive cardstocks almost make the cards by themselves.  Worth saving you $ to invest in, truly.  I used the umbrellas on the background and then I cut the scallop out of the polka dots on the other side.  I inked the edges.  I cut out a cloud – my own design, available under my Free Silhouette files tab, top of the blog.  Then I cut out the leaves, again, I’m a “make it myself girl” so I created the leaves – remind me and I’ll post those too sometime.  I punched the stars and inked. The word-art came from TLC Creations.


365-Day-174-close 

I added the gems – Studio 112.  These are the neatest – I tried to catch myself reflected in this one but I could not get an angle that would exclude the camera lens.  I wish I’d bought more – they could be so many things, from raindrops, candle flames to real tears.  Ah well, something to wish for.

And I will end this section of my cards with a last photo which will in turn start off the next part of this post – FINISHING a card off, in style.


365-Day-174-inside

I’m big on spending some time on the inside of my cards.  A small touch will set it apart from other cards.  Little snippets from your designer paper, either punched out or snipped and layered really pulls your card together.  I even have made myself a template which I can run through my printer which puts my name and email onto the back of each card – but I’ll save that for another day. 

What I want to share with you here is something that hit me at 7 a.m. this morning and had me sitting up and planning first thing.  Before my morning coffee and chocolate even.  If you’re a regular here you will know that’s my standard breakfast, one or two squares of GOOD chocolate and a coffee.  I’m not a breakfast girl but I do go for snacking before bed. 

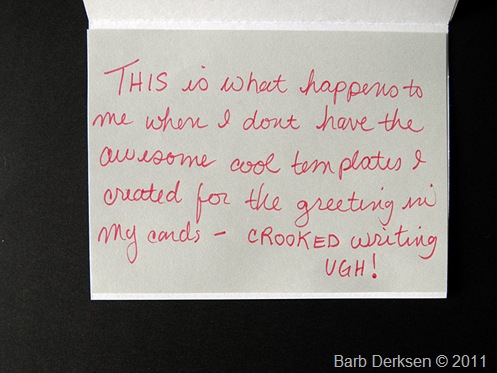
I was thinking that my cards often look pretty nice until I go to write my greeting inside.  This is because I cannot write in a straight line – oh how I envy those of you who can.  Yes, a few times I’ve even gone so far as to use a ruler to draw the lines out by hand on a card in pencil and erase them afterward.  That’s when it hit me – why don’t I design a template for that  using my fancy schmancy Silhouette SD?  So, thats exactly what I did – and I’m providing it here for you – both in png format so that anyone who has a cutting machine that can take png then these will work for you!  I’ve made them in both landscape and portrait for a standard 1/4 fold card and also in a square 5 and 1/2 inch card too! 

Here are some photos to show you what I mean, in case you are like me and need a visual to “get it”
 

Barb-Derksen---card-temp1

I think this is self-explanatory.  Nice card, bad handwriting.


Barb-Derksen---card-temp3


First cut my template out of a good heavy cardstock (in a brilliant and ugly color I suggest so it will always be easy to catch your eye because you are going to use this handy dandy template a lot)  When you are ready to write your greeting, simply lay the tempate over the right inside of your card and use the spaces to pencil in lightly. 


Barb-Derksen---card-temp2

Whether your card is “landscape” or “portrait” these templates are perfect.  I included a square one after I took these photos, specifically because of today’s 365 challenge reminded me there are square cards too. 


Barb-Derksen---card-temp4

And after that – while I certainly won’t win any awards for my penmanship, its fairly neat.  Notice I left some space between the greeting line and the signature lines?  Once you erase the lines it may even appear you have the envious talent  of writing straight, your secret is safe with me. 

So, I’ve packaged these templates up for you and zipped them in a file along with my Terms of Use.  These are for personal use.  Please don’t pirate (copy) my designs – and if your friends think these are cool I ask you send them here to download, its the polite thing to do.  They will ALWAYS be available on my blog – I’ll pop them into the archive tabs (top of the blog) when this page gets stale.  Last note, a little bit of comment ♥ goes a loooooooong way Open-mouthed smile 

Click on the graphic below  to be taken to download the zipped folder at Ge.tt  (a little plug for Ge.tt – they are a FABULOUS place to host and share all your files, simple, fast, easy to use and NO ADS!!!  I ♥ your service!)   If you don’t know how to deal with a zipped file then comment me and I’ll send you the single files.  Happy Carding!


Barb-Derksen_Card-Inserts_prev

Friday, August 19, 2011

Mini-Vacation, More Cards and FREE Silhouette Cutting Files!


My sweet Mr pried me away from my crafting for a few days, the same day my sister Nina left to go home – a good thing because I am sure I would have been melancholy otherwise.  We had reservations at Deception Pass State Park in Washington, right on the ocean.  We stayed three days and it was blissful.  The weather was fabulous, I even soaked up sun there too.  Very restful and yet we did do a 5 hour hike one day, over the bigggggg bridges while mist boiled around us.  I heard tell this is fairly common with the warmth from the land confronting the cool breezes off of the ocean.  Very beautiful!

Because this was a small trip I savoured every single moment as if each thing that I saw became the first line of a story eg: as we were heading down a trail we had to pause while a boy took a photo of an older man, in my mind I began a story like this.

“I remember the summer I spent with my Granddad.  It was the  year after Grandma had passed away and my folks thought it would be good for both me and Granddad to spend some time together.  I like my Granddad but I thought it was just a good way for my parents to save some money on a babysitter, and besides, I had made plans with my friends Richard and Lou.”

Those sorts of stories, taking people, smells, sounds, sights and then casting them in little side vignettes.  One day when I’ve had my fill of crafting for a while I may just try to write a bit too. 

Here’s a little slideshow of our time away:

And so now on to a few cards that I did not have a chance to post before we left and one I’ve made since and a couple of free cutting files as well!  (I will put the studio files under the tab up top of the blog)

The first card was a challenge, I believe from Simply Stamping but I can’t find the exact link for that.  I created this while my sister Nina was here, you may want to check her blog out for I know she made a lovely rendition of a summer card too. 

Stamp-Something-_-Summer-full


I’m not sure on the supplies, but the background paper was a mini kit, summer themed with adhesive on the back.  I found the pattern for the flower/sunshine in a Scrapbooks Etc magazine.  I embellished it with a button and then a gem in the middle. 

Stamp-Something-_-Summer-cloud

I created the cloud myself, I will be placing this cutting file up for grabs under the Free Silhouette Files tab. 

My next card was the Day 167 – Super Sketchy Sunday at 365 cards Here is the sketch given:


And here is what I made of it:

365-Day-167-full

My sister Nina tackled this one too!   I used The Little Yellow Bicycle’s Twig paper which has a “wordy” pattern on the front and then the blue on the other side.  Love double sided papers!   Ah yeah, I realized later that I had the wordy paper upside down in the background but I claim that as artistic licence *snort* 

365-Day-167-close

I cut the hollow “ribbons” from matching cardstock colors.  I designed the ribbons myself and the studio cutting files are available under the top tab too. 

Lastly, I tackled Mojo Monday # 204 as well today (after spending 1/2 the morning on support with Silhouette this morning trying to sort out a cutting issue I’m having.  I must say the support is wonderful!  Real live people and very very supportive and helpful) I must say I make my machine jump through hoops because I like to design a ton of stuff myself. 

This was the sketch for 204, and here’s my version of it.

mojo204-full

I worked so hard on this it only just occurred to me to that I forgot the ribbon.  As it is my Mr says his personal opinion is that the card is already too busy so perhaps its best I forgot that.  My niece Samantha certainly did not forget – her cards are wonderful and include the ribbon.  She even made two cards!  Wow.

Once again, I’m including the cut files for both the “icing” and the cupcake wrapper.  I used a paper by Recollections called Cupcake … something?  I cut it off – ooops!  I layered several sections using cardstock which coordinates with the colors in the cupcake paper.  I embossed the blue cardstock using a Fiskars embossing plate.  I used a piece of crochet cotton for the bow.  I made the icing by cutting out and glittering with a Be Creative adhesive sheet.   I cut out the cupcake wrapper and then ran it through a Fiskars crimper. 

mojo204-close

The last touch was the little teardrop, one I picked up at Jo-Ann’s in Bellingham – Studio 112 Adhesive gems.  I also cut the three stars, I’ve since changed them to blue ones cut out of the blue cardstock, but I’m not going to take another photo as the sun has gone down.

Hope you have a terrific weekend (if I don’t get to blog again, but suspect I might!)

Monday, August 15, 2011

Bye Lil Sister & and a Freebie!

My little sister motored out of here this morning at the ghastly dark hour of 4:30 a.m. I could almost trick myself into thinking that it was all a dream, but alas its true.  I had such a blissful sisterly time with you Nina!

I'm posting a free png and cutting file today of a tomato.  I used this file to cut the tomato in my last post's cards section so just check it out to see what it could look like.  I'm providing it both in a png format as well as a Silhouette SD file (.studio)  Hope you have fun with this!  Fine for all uses, with a link back and credit.

NOTE:  Friday, Aug 19th - I have re-uploaded the studio files because I had the tomato and the stem grouped together.  Have now created two separate files so you can cut them independently.   thx for your patience, am on a learning curve here! 


PS - notice the new link on my sidebar for the top 40 Silhouette SD sites?  Yay!!

Sunday, August 14, 2011

Just a Whole Lotta Cards!


My little sister Nina has been visiting for this past week but she took a break in between for 2 point something days to take off and see some more friends and family as well and she welcomed me to play with all the supplies she brought along to card with – and even some of the new things we bought when we went shopping in Kelowna.  I’d have hated to disappoint her so I went wild.  At one point my Mr asked me if I realized I had spent two full days in my craft area.  Ha!  Its all Nina’s fault, she got me started. 

So, I’ve been fulfilling challenges along the way and so here we go. 

365 blogspot cards:

Day 160 – the sketch

My take:

Day-160_Barb-Derksen_full

Day 162 – the goal is to place an odd number of decorations (including the sentiment) on your card

Day-162_Barb-Derksen_full

stamp: The Stamps of Life

Day-162_Barb-Derksen_close

I used the Be Creative tape sheet, cut out in a circle and then used the Glitter Ritz ultrafine glitter for the centre.

Day 163 (the first, there were two day 163’s?  I did them both!) - This challenge is to "set the scene", specifically an underwater scene.

Day-163-2_Barb-Derksen_full

Stamp: The Stamps of Life

Day 163 (second one) - Use your garden to inspire your card.

Day-163_Barb-Derksen_full

Tomato – my own design (will give the design and cut file away later on)  The labels are from Saxon Holt’s kitchen labels.  I made the sentiment myself.

Day 164 – we were asked to use our favourite team colors. 

Being as I am not a sports fan much at all I chose to make a Red and White theme because I would root for Team Canada if I did like to root!

Day-164_Barb-Derksen_full

Clean & Simple Sunday Challenge #19

the sketch

My take:

CASS-19-full

Tree Stamp – KanBan

Love Life – The Stamps of Life

CASS-19-close

Clean and Simple

the sample image:

my take:

BDerk---FTL-153

Ok, so I’m getting feedback that this card looks sort of like a tombstone in shape.  Humm.  I don’t think I’m going to be using this look again. 

I do like the graphic.  It was a trace from a free vector – I asked my Silhouette SD to trace it for me using a pen!

Whew.  Done for another 1/2 hour, can fit in one more card with my Sis before the supplies get put away for a bit. 

Thanks for coming to visit.

Thursday, August 11, 2011

Card a Day’s–159 & 161


Here are two more creations I managed to squeak in this week all the while having a fabulous visit with my little sister Nina!  I’ll save all the visit photos etc later on when I can process them.  In the meantime:


Day 159 – the requirements were:

Create TWO opposite combinations on your card -- the combos you choose are up to you.

My opposites turned out to be the keys on this card – one is small, one big – one old, one new. 


Day-159_Barb-Derksen_full

I must confess I really struggled with this one.  I’d have hid it under bed or something haha, but I am determined to finish up my challenges – besides beauty is in the eye of the beholder and perhaps someone will really love this one. 

The stamp was a Tim Holtz from his Components Collection.  I mounted it on cork.  I cut the keys out on my silhouette SD.  I cut some black lace out (did you know you can cut wide lace using a rotary blade cutter?)  I then layered on a sheer ribbon and added some wooly thread.  I wrote the sentiment by hand. 


Day 161 – the requirements were:

Create at least one balloon on your card using an item or object that wasn't originally intended to be a balloon.

I was tickled that my sister played along with me on this one – check out her card HERE! Here is my take on this:


Day-161_Barb-Derksen_full

Well, I probably failed at making something that wasn’t a balloon in the first place into one – just could not think one up so anyways I used something new to make the centre one.  Nina and I checked out a few Scrapbook Stores and I treated myself to some Be Creative Glue sheets and used my Silhouette SD to cut the balloon template out.  It will take me a few tries to get this down to a science, but its fun.


Day-161_Barb-Derksen_close

I love the look of it!  I also cut the two other balloons out using my Sil and then I stamped them with a Versamark Dazzle, sprinkled them with Stampendous Clear Embossing Powder.

More cards to come.  Hope you all are having a terrific summer.  I hope to take a day out soon to catch up on my email and blog hopping and hope to visit YOU and to add more goodies to my “vault”!

Wednesday, August 10, 2011

Two more cards–Day 158, 365 Challenge and A Clean and Simple FTL 152


Just time to post two more cards, working on some more in between a very busy visit with my sister Nina.  We have been zooming all over the place and soaking up sister time – I can’t begin to process it all until later and it will be good blog-fodder.  We are being truly pampered by my Mr who ferries us hither and tither to all points and even carries anything heavy for us and gives us a ton of sibling-time.  Treasured moments!

FTL #152 from Clean and Simple.  Here is the card idea we were given to work from:


And here is my take on it:

Clean-and-Simple-FTL-152-Barb_full

The hearts were stamped with the Stamps of Life “Hearts2Love” stamps and then embossed with clear embossing powder. The grey cardstock shape was cut using my Silhouette SD.

Clean-and-Simple-FTL-152-Barb_close

My final touch being the pearl accents from Forever in Time. 

Day 158 for 365 cards

We were asked to:

“Add at least TWO sweet treats to your card, any way you want.

Patterned paper counts as one of the ways.“

And here is my take on this:

Day-158_Barb-Derksen_full

I created the “candies” by wrapping pretty buttons in transparent paper (recycled from a bouquet I’d received in the past – don’t you hate the waist of tossing that away … they give you so much!)  The Sweet stamp is one from Studio G.

Day-158_Barb-Derksen_close

After I prepped this photo for my blog I realized the foam tape shows at the back of the candies so I actually removed them all and used a super glue to put them back.  Much nicer after this but I did not get a new photo. 

More cards to come soon.  Thanks for stopping by. 

Total Pageviews

Popular Posts